I originally recorded this playthrough with running commentary in late August 2021, and the plan was to post it to my Erifellen YouTube channel. Unfortunately, YouTube wouldn't process the video, and I still have no idea why. I tried everything I could think of, from breaking it into shorter videos to re-encoding with different qualities and different video formats, but nothing worked, not even ten-minute clips. I'm using the same video software with the same settings as every other video I've posted, and not a single one of them, including several other ALttP videos, have had any issues.
So I've pretty much given up on posting the full playthrough, but I didn't want to just abandon it entirely, so I decided to do something like a number of Let's Play forum threads I've seen and post a narrative with some screenshots. Commentary here is a mix of what I said live on the recording and retrospective remarks from after the fact.
I'd like to come back to sharing a proper playthrough in video form eventually, but it's not likely to happen until I get around to figuring out streaming, so that, at the very least, I shouldn't have to worry about whether the server will suddenly decide it can't process the video!
The recording starts off as the game loads up, and I let it run through the title screen and attract mode while talking through an introduction to the video.
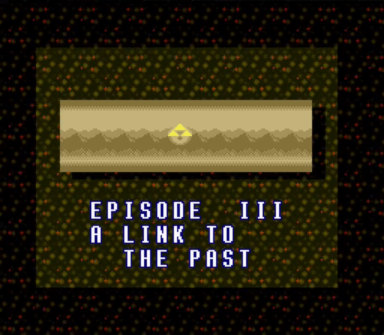
(0:00:30) "Episode III: A Link to the Past"
The Randomizer replaces the opening text with its own custom text that has a somewhat quirky sense of humor, like the Star Wars reference above.
In any case, my first comments are about how I'd been both looking forward to and in a way dreading doing this recording. Dreading, because I knew it would go on for probably several hours, drastically longer than any video I'd done so far, and I wasn't sure I'd be able to keep up commentary for that long.
I'm used to typing (and proofreading, and revising, and rewriting, and doing it all over again several times, and...), not talking. I'm not accustomed to thinking out loud or narrating what I'm doing, and I was afraid I would keep going quiet out of habit whenever there was a lot going on or I had to think about what to do next. As it turns out, other than one major instance that I ended up editing out of the video (not that it matters if I can't publish it anyway!), that wasn't a problem for the most part. As I mention every so often, a big part of the reason I started doing videos with commentary in the first place was to try to get more used to verbalizing, and saying what I'm thinking more-or-less coherently, preferably without tripping over my own words or sliding into low-pitched mumbling, so being mostly fine was fairly reassuring!
Anyway, I wasn't sure I was ready to attempt this, but I was out of bed reasonably early, had gotten dressed, finished breakfast, gotten dinner started in the slow cooker, expected to have the room to myself for several hours, with nothing else that needed attention, and plenty of water at the ready. I could hardly ask for a better opportunity to give it a shot, so I screwed up my resolve, tamped down my anxieties, and got started before I could change my mind.
At this point I briefly mention the multitude of options that the Randomizer has, and that I'm using the Beginner preset in hopes that it will help things go more smoothly. Among other things, the Beginner preset includes the Assured Sword setting, which starts you off with a sword, so that's one less thing to find. Since the Randomizer takes all the game's items and shuffles them around, you normally start with nothing (other than the usual three hearts and green clothing), and who knows how long it might be before you find a serviceable weapon. The sword is familiar and easy to use, works on most enemies, and has its own dedicated button, so having one from the outset is a major convenience that prevents a lot of potential awkward situations.
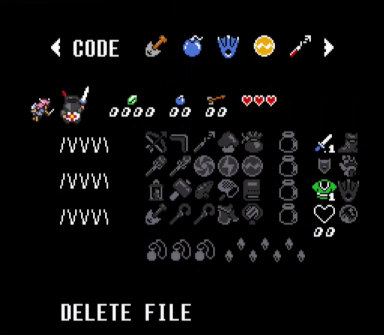
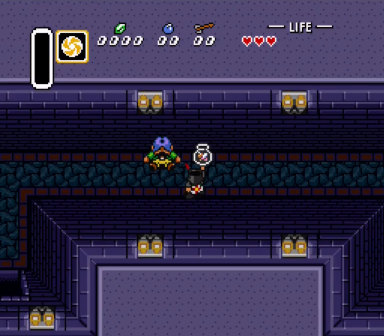
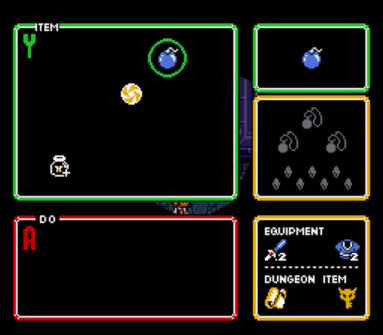
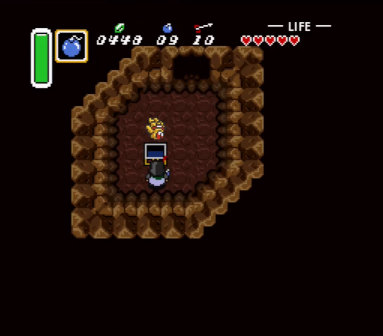
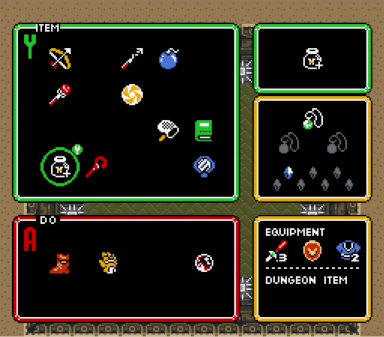
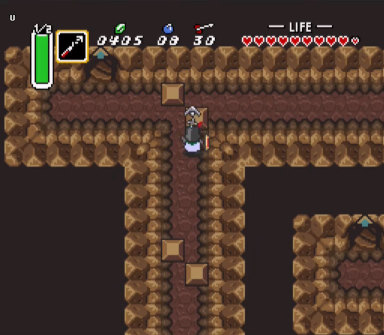
(0:02:20) File created, named ハハハハ ハハハハ ハハハハ. The Randomizer selected a knight sporting a sun logo for the player sprite, and we're starting with a sword. A code at the top of the screen shows the Shovel, Bomb, Flippers, Quake, and Hookshot icons, and is used like a checksum to ensure everyone in a race is using the same seed.
Starting off, I give myself a nice, meaningless name. Since the Randomizer uses the Japanese 1.0 ROM as a base, Japanese kana as well as English letters are available for naming your character, and since it uses a single save file instead of three, you can have three lines of name for the save file (in-game text that uses your name shows only the first line).
I like to use the random sprite selection option, so my character could be any of the more than 300 available options, and I don't know which one until after name entry. I refer to this fellow as a Monty Python knight during the run, and he certainly looks like one, but it turns out this is actually Solaire of Astora from Dark Souls. I've never played Dark Souls, but do end up making a few mentions of his whole "praise the sun" thing anyway, all why wondering why I can't remember that scene from Monty Python and the Holy Grail. Because it's not from that, silly! Cultural osmosis is a funny thing.
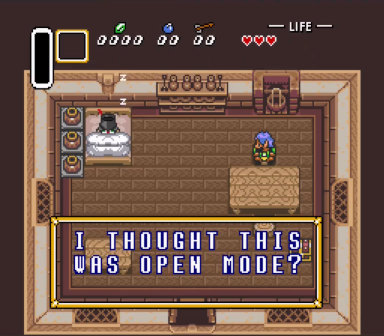
(0:02:35) As Solaire wakes up, his uncle looks over and says, "I thought this was Open mode?" before rushing out into the rainy night.
The Beginner preset uses the Standard world state to begin the game, which means we start from Link's Solaire's house and need to go rescue the princess from the castle dungeon before exploring the rest of the world. As our uncle implies with one of his randomly-selected quips, the other commonly-used starting state is called Open, which puts Zelda at the church to begin with and allows us to start either here or there and to begin exploring the rest of the world immediately. There's also a Retro mode that resembles Standard but makes some Zelda 1-like changes such as universal keys and a rupee-fueled Bow, and an Inverted mode that resembles Open except that the Light World and Dark World are basically flipped.
Most dialog, lengthy cutscene text in particular, is stripped out of the game to keep the action going when using the Randomizer. Here, Zelda's whole telepathic message and your uncle's warning to stay in the house until he returns are replaced with just a single line, usually more silly than anything else.
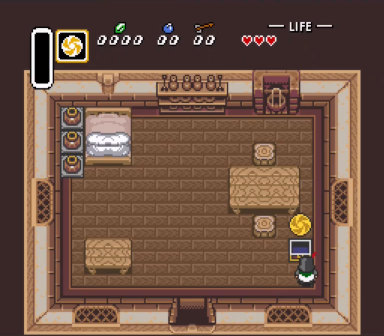
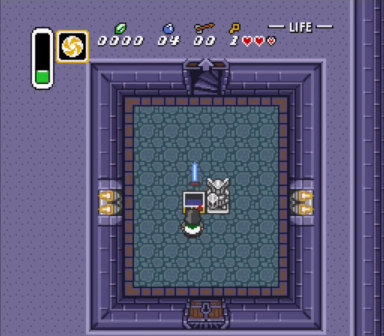
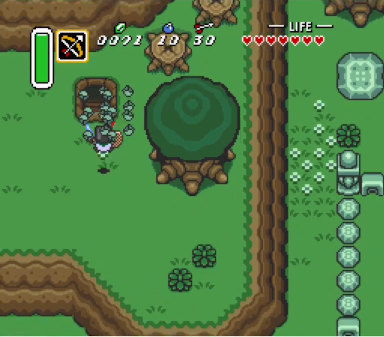
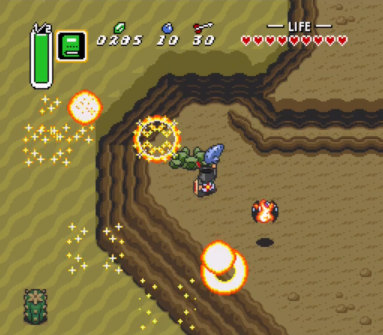
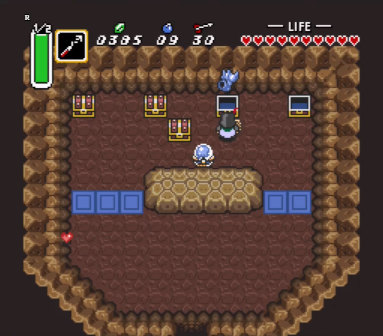
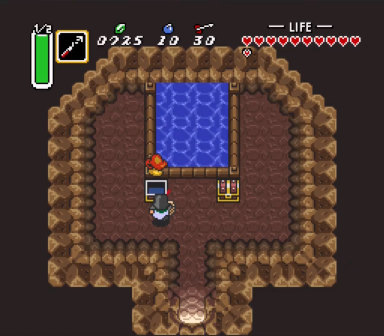
(0:02:48) Bombos medallion from Solaire's house chest. Praise the swirly design sun!
Bombos! Not bad for a first chest, and with that starting sword, all we need is some magic to be able to use it. It might or might not end up being necessary, but it never hurts to have it. Anyway, Standard world state means we need to go rescue the princess, so off to the castle we go!
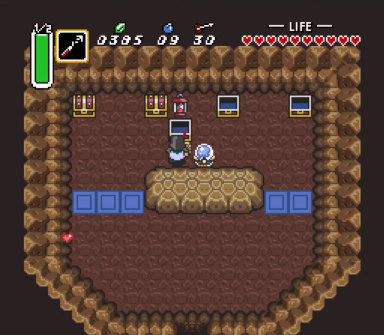
(0:03:22) Solaire's uncle gives him a bee, and more importantly, a Bottle.
Uncle is collapsed in his usual spot, and hands over a random item. In this seed, it's a Bottle, with an incidental (or so it seems at the time) bee inside.
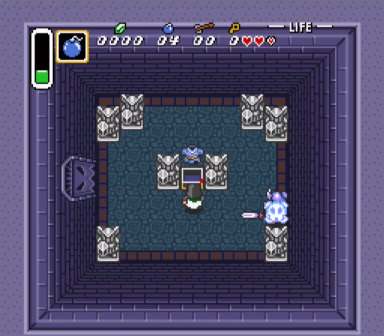
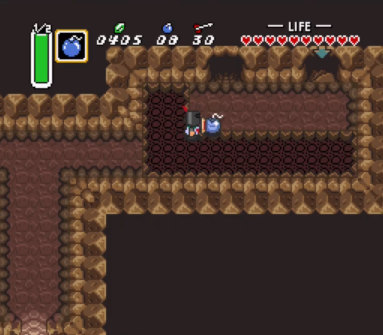
(0:03:38) A pack of Bombs from the chest in the passage into the castle courtyard.
One of the soldiers drops a Bomb, and more turn up in the chest nearby. Those will come in handy before long.
The basic concept of the Randomizer is that it takes all the items and shuffles them around, which is why we're finding things in strange places. There are, though, some exceptions, the most important one being that unless you specifically choose a setting that ignores this, items will always be placed so that they don't lock each other out or make the game unbeatable. For instance, the Hammer won't be somewhere that you need the Hammer to reach, or if you need the Hookshot to reach the Gloves, then the Gloves won't be required to get to wherever the Hookshot is (though I say the second part backwards while recording... whoops).
(0:04:44) The Master Sword comes out of the Hyrule Castle map chest! Praise the generic statue sun!
We continue into the castle dungeons and promptly find... a second sword already? Nice. With the sword upgrade making them more trivial, I take out a few of the guards along the way, though speedrunners normally just rush past without fighting unless they're hoping for a Bomb drop.
Along the way, I briefly explain and demonstrate the quickswap option that lets you cycle through items with the L and R buttons, which ALttP normally doesn't use for much of anything. It's a nice little time saver if you know your item order well enough... and also an extra way that runners can make mistakes.
(0:05:27) Armor in the Boomerang chest? Seems weirdly early, but I'll take it! Praise the small army of statues sun!
An armor upgrade turns up already, too. This and the similarly early sword may be related to the Basic item placement setting that's part of the Beginner preset. One effect of Basic placement is that it guarantees certain amounts of upgrades will be available before you're expected to take on more difficult dungeons, with the idea of shielding the player from having to attempt any excessively difficult execution. Races typically use Advanced item placement, which, as long as progress is possible at all, doesn't care how much your lack of equipment may make you struggle along the way.
The big key drops from the ball and chain trooper as usual, and Zelda joins without saying a word. Again, most dialog is removed for convenience. The key dropping here is no surprise, either, since the standard Randomizer will not (as of yet) affect any keys that drop from enemies or are found under pots/skulls in dungeons. If the enemies themselves are shuffled (one of the options we're not using), each key drop stays in its normal location, and whatever creature replaced the enemy that normally drops it will drop it instead. For instance, if the ball and chain trooper had turned into a rat, that rat would have dropped the big key.
Another restriction of the item shuffling is that the three Pendants and seven Crystals you get as dungeon prizes are only shuffled amongst themselves, and not shuffled into the general item pool. You won't find the green Pendant in a random chest somewhere; it has to come from clearing a dungeon.
Additionally, under the basic settings, dungeon items (maps, compasses, and big and small keys) are restricted to their own dungeons. The map for Eastern Palace will always be in Eastern Palace, and the same for the compass, big key, and any small keys. There are additional options that allow shuffling some or all of these into the general pool, which (for keys, at least) tend to make the game longer and more complicated because you have to go all over looking for them instead of having them guaranteed to show up somewhere inside their usual dungeons.
Speaking of which, the key we'll need to make it through the passage to the church is in Zelda's cell. Since we need it to get past the locked door, that's the next to last place it could have been. The last possible place is Dark Cross, the chest in the dark passages where the key appears in the unrandomized game, and that chest gives us the dungeon map this time.
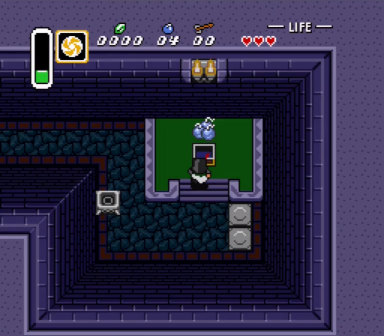
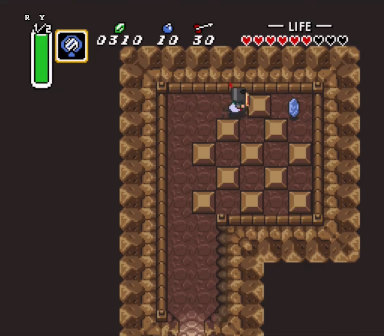
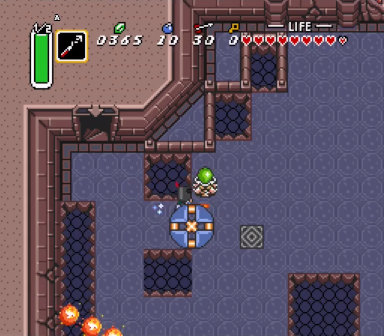
(0:08:18) We have some light in the dark rooms despite not having the Lamp. Praise the Randomizer sun! Also note, though I forgot to mention it, that the Randomizer adds a number on the armor to indicate its level, mainly for the benefit of colorblind players. It similarly adds R (red), G (green), and B (blue) in the corner of the potion icons.
An interesting thing happens in the dark passages when using Standard world state (or any other mode that starts with the escape sequence). The Randomizer lights up your immediate surroundings here, even if you haven't found a Lamp yet (which you probably haven't). It's generous in a way, but the real reason isn't so generous. Allowing you to see what you're doing regardless lets the Randomizer place the Lamp later on, possibly much later, instead of giving it out early.
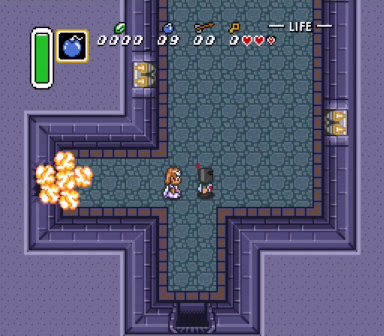
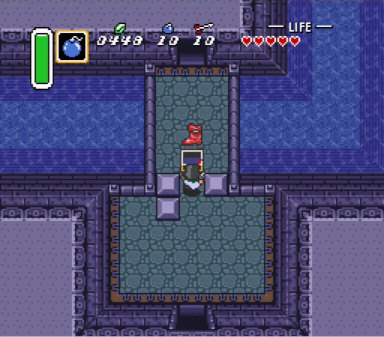
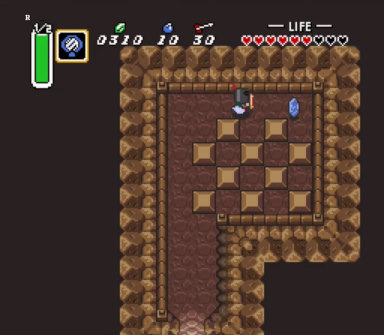
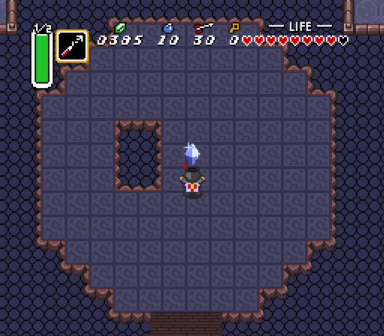
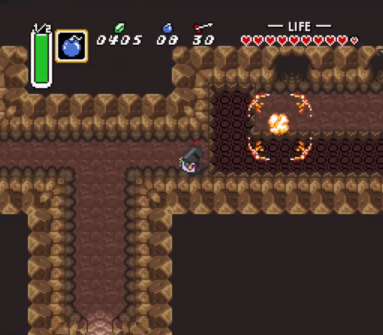
(0:09:04) Here's where those Bombs we found earlier come in handy, opening the sealed room along the escape route.
Having Bombs means we can check the room behind the destructible wall right now and not have to worry about maybe coming back for it later (either after finding Gloves, or coming all the way from the castle again if sufficiently desperate). When the game starts with the escape sequence, runners will often try to kill enough enemies along the way to either get a Bomb drop or confirm that the available enemies can't drop any, and this room is the main reason why.
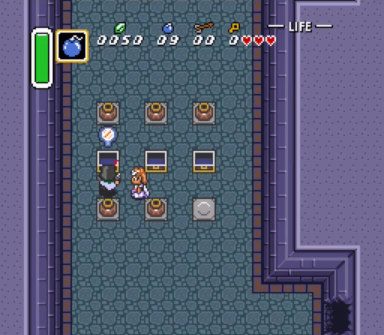
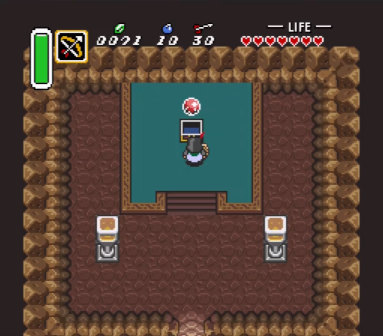
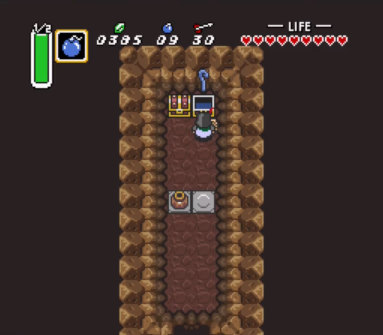
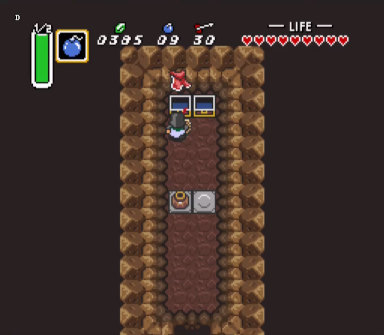
(0:09:13) The Mirror in the sealed room! Praise the rows of pots sun!
The first two chests are nothing major, just a shield and some money, but the third has the Mirror. Although that may not end up being essential, it's a nice convenience item, and if nothing else, getting it before going to the Dark World is ideal for much the same reason as getting Bombs before reaching this room.
Speaking of Bomb drops, enemies in Randomizer generally don't drop their usual items. ALttP groups enemy drops into what are called prize packs, which are seven different sequences of items. One is mostly hearts, one is mostly magic jars, one is mostly Arrows, one is all Bombs, one is rupees in various denominations, one is a variety of low-end items, and one is a variety of high-end items. Each enemy uses one of these prize packs (or an eighth, empty one), and when an enemy drops something (not counting keys), it drops the next item from its associated prize pack. The Randomizer shuffles the seven non-empty prize packs with each other, but keeps enemies that share packs sharing the same packs as usual.
In this particular seed, basic guards, snakes, and other enemies that normally drop mostly hearts instead drop mostly Bombs, often in large quantities, which is convenient for stocking up early. Enemies like the rats that normally drop lots of money instead drop mostly magic jars (though when I remember to start paying attention to their drops at this point, I initially think that they still have the usual money prize pack, because one drops a blue rupee).
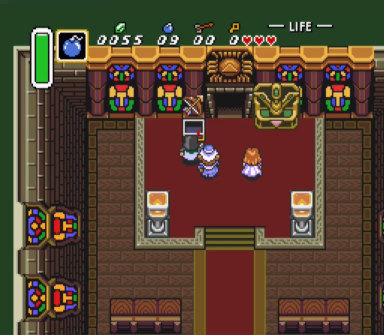
(0:09:59) A Bow in the church! That's another great item to find early. Praise the stained glass windows sun!
Anyway, that's escape cleared, opening up most of the rest of the Light World for exploration. Armed with a shiny new Bow, courtesy of the resident priest, it's time to venture forth and check all the checks we can check!
Upon getting free rein to explore, most players will head to the Lost Woods and Kakariko Village due to the sheer item density there, meaning that you can collect a lot of items in a short amount of time, so we'll start with that. Since there's no telling where anything is, the more items you get the faster, the better.
The Lost Woods has two items ripe for the taking, which total 55 rupees this time. That at least brings us over 100, a good place to be at this point.
(0:11:13) Tugging on a tree results in... four rupees. I am disappoint.
And this is a good opportunity to check on tree pulls, which are also randomized. These are the sets of four identical items that you get by tugging on certain trees and other objects. The tier 2 prize—meaning the items you get for doing a pull after killing at least four enemies since the last pull (or since starting or loading the game), and also taking damage since then—is just green rupees in this seed, so it's useless. You get the tier 1 prize regardless of whether you've taken damage as long as you've killed at least one enemy but no more than three, and the tier 3 prize if you've killed at least four and not gotten hit at all since the last pull. The original unrandomized game gives green rupees for tier 1, blue rupees (worth 5 each) for tier 2, and red rupees (worth 20 each) for tier 3.
The real item density is in the village itself, though. The woods are just convenient to check at the same time. Starting with Blind's hut, we find some money, some Bombs, a heart container (nice to get early on), and...
(0:12:25) Silver Arrows in Blind's hut! That's going make some things almost too easy. Praise the block puzzle sun!
...the other Bow! (The Randomizer originally treated the Bow and the Silver Arrows as two separate items, but the current version places two progressive Bow items, with the second one you find providing Silver Arrows). Finding both Bows so early is kind of an overwhelming advantage, but I'm not complaining!
The well has another five chests, but they're all money and Bombs this time, nothing exciting.
Money's not a bad thing to get early, though, since some things do take a certain amount of cash, and although it may be possible to skip some or all of them, all the randomization means there's no telling what you need or don't need ahead of time. It's always better to have too much money than not enough.
(0:13:30) The bottle merchant sells us a new pair of Gloves! Praise capitalism the sun!
In the short term, we want at least 100 rupees to buy whatever the local merchant is selling today, so we don't have to leave him for later and risk forgetting about him entirely. Although it's not uncommon for him to rip us off, in this seed, he has the Power Gloves! Those open up a lot, and are easily worth the money.
Next, to the chicken hut. Some people like to play around with the chickens, maybe try to toss them into the void between the rooms, but there's no real point to that, and it can even get you stuck if you do it wrong. We'll avoid anything fancy and just go collect the chest, another heart container this time.
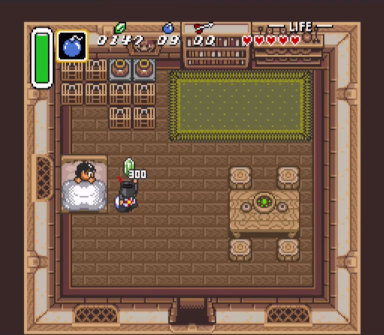
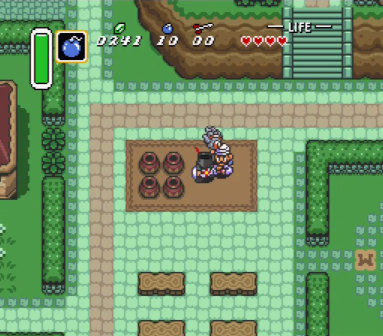
(0:14:12) The sick kid must really love Bottles, considering that he hands over 300 rupees just for a glimpse of one!
Having that Bottle from uncle means we can do another check right away that would otherwise need to be put off until later. The sick kid, who normally hands over a Bug-Catching Net to anyone who brings a Bottle to put bugs in, of course has a randomized item instead. And this time, he's filthy rich! Even if he had nothing worthwhile, though, it's reassuring to get this check out of the way and not have to worry about it later.
The back of the tavern has some Arrows, and with that, all that's left to do in the area are two last checks in the southern outskirts.
The library has an item on a bookshelf. We can't get it yet without Boots, but there's nothing stopping us from seeing what's there. This seed, it's a heart container, which is nice, but nothing essential, so we probably won't be coming back for it.
And then there's race game. Like the library, the item is out in the open and can be checked ahead of time, so we go do that and see the Bug-Catching Net. That's also not essential, but it's not too far out of the way, and the ability to catch faeries makes for a nice safety net just in case, so let's go for it.
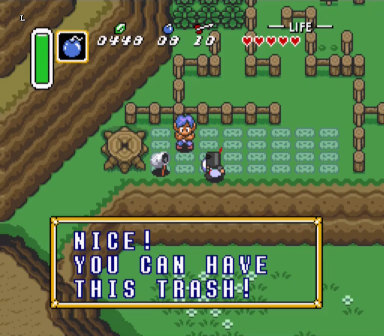
(0:15:38) "Nice! You can have this trash!" That's not commentary on the bug net; he says the same thing no matter what the prize is.
The race NPCs are among the few who do still have some dialog even in the Randomizer, but it's trimmed down to the bare minimum. What unskippable text remains tends to be very short and to the point, and somewhat silly. It's still possible to talk to various unimportant NPCs, and they will talk, sometimes even at length, but their dialog also tends to be replaced with various pointless silliness and in-jokes.
A racer would probably save and quit at this point to restart at Link's house and get to the next checks more quickly, but it's not all that long of a walk if you're not trying to save every possible second. And, come to think of it, a map check would be a good idea.
(0:16:19) The Light World map shows that Crystal 3 is in Eastern Palace, the Pendant of Courage is in Desert Palace, and Crystal 6 is in the Tower of Hera.
The green Pendant and Crystals 5 and 6 are of special significance because they lead to additional items—the green Pendant by showing it to Sahasrahla, and Crystals 5 and 6 by unlocking the jumbo bomb to reach the Pyramid Faerie—so the map highlights them by displaying those Crystals in red rather than the usual blue and by adding a special symbol to the corner of the green Pendant icon. Different character sprites also have corresponding different map icons, and Solaire's location is, appropriately, marked with his sun symbol.
Next up, south shore checks, which include everything in the general area of the southern shore of Lake Hylia.
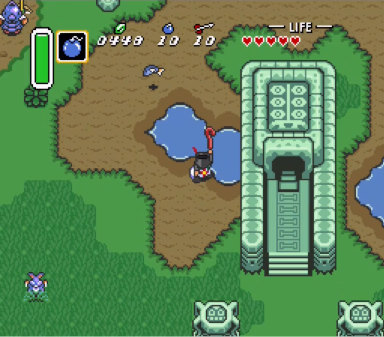
(0:18:06) Inside the floodgate are the Pegasus Boots... (0:18:24) ...and the Cane of Somaria is hiding under the water outside. Praise the pond sun!
Right away, the floodgate hands out two very nice items. The Pegasus Boots may or may not end up being required, but dashing is always a huge convenience and time saver, so every racer loves to find them as early as possible. Somaria, on the other hand, is absolutely required for two dungeons (though they might yet turn out to be optional) and possibly also for Ganon's Tower, and allows for quite a few tricks and shortcuts elsewhere.
With the Boots, checking Aginah's cave in the desert feels less like a waste of time, so we'll get that out of the way right now.
(0:18:51) The old desert sage is hoarding the other set of Gloves. Praise the hexagonal room sun!
Oh! That was unexpected. It's just confirmation bias, I'm sure, but it always seems like he only ever has anything useful when you put off checking until much later. But getting both Gloves (like the Bows, they're progressive items, so it's always Power Gloves → Titan's Mitts, whichever order you find them in) means never having to worry about heavy rocks getting in the way, and we're just a Moon Pearl short of Dark World access.
I'm not sure whether Basic item placement logic has anything to do with all these early useful items. Swords and armor and health, yes, and maybe the Bottle and Bug-Catching Net, but the rest of it isn't really related to making dungeons less intimidating, so it's probably just the Randomizer being random.
On the way into Mini-Moldorm Cave, I note that the point of placing Bombs early when approaching a cracked wall and then tossing them into place is that the fuse starts a bit sooner that way, so you don't have to wait quite as long for the explosion.
Inside the cave, we can walk along the south edges of the pits without falling in, and between that and the Master Sword, the mini-moldorms are no trouble. The cave is pretty much a bust this run as far as items go, though, just giving up some money and ammunition, another heart container that couldn't hurt but isn't all that big of a deal, and a second shield that isn't likely to matter at all.
Speaking of shields, runners generally prefer to avoid getting the Mirror Shield if possible, because it can cause extra lag frames, marginally slowing the game down in a way that can add up over the course of a race. Shields just generally aren't all that useful in this game.
Runners sometimes stop checking south shore after Mini-Moldorm Cave. I generally prefer to keep going and check Ice Rod Cave instead, especially with the Boots to make it more convenient. Nothing there this time but more Bombs, though.
This would be the perfect opportunity to set up a Water Walk and do some Flippers checks, but I decided ahead of time that I wouldn't be doing any sequence breaking on this run, so it's time to save and quit instead to reload from somewhere more convenient.
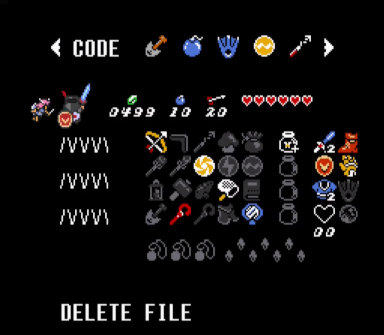
(0:21:27) So far, that's the Master Sword, second shield, blue armor, six heart containers, Pegasus Boots, Titan's Mitts, Silver Arrows, Bombos, Bug-Catching Net, Cane of Somaria, Mirror, a bee in a Bottle, and 499 rupees. Not bad for barely twenty minutes into the run!
Taking stock of inventory, things are looking pretty good. However, it's still not enough to put any dungeon fully in logic. Eastern Palace comes the closest, and it's possible to beat it like this, but we'd need a light source to finish it without going out of logic and technically sequence breaking.
In Basic item placement, which the Beginner preset uses, all dark rooms (with the exception of the escape sequence when forced to start there) are considered out of logic until we have a Lamp. Advanced item placement allows for dark rooms to be in logic without it, provided that we have the Fire Rod and the room has torches for it to light. Eastern Palace has both types of dark rooms, making both the boss and at least one of the chests off limits for now.
That said, we can get most of the items out of it, and there are more along the way, so let's head over there anyway.
Sahasrahla's closet has our seventh heart container, along with a bit of money and some Bombs, but no Lamp or other progression items. Armos (and other enemies with the same prize pack) also turn out to drop Arrows as usual, which could be useful to keep in mind, particularly with Silver Arrows handy.
Eastern Palace doesn't have its usual music, instead using the Dark World dungeon theme. The Randomizer does this by default when a dungeon contains a Crystal, and uses the Light World dungeon music for any dungeon with a Pendant. However, if using a setting that shuffles maps into the general item pool, dungeon prizes don't display on the world map for each dungeon until you get the corresponding dungeon map, and the music for each dungeon (other than Hyrule Castle) is also randomized to avoid spoiling anything. This has the interesting side effect that Ganon's Tower may have the Light World dungeon music in such modes.
On that note, the first chest in Eastern Palace has the dungeon map in this seed. Maps and compasses are useless on these settings, though.
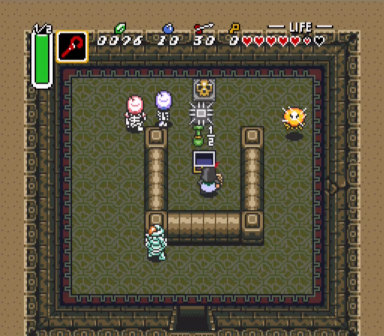
(0:24:11) Big key in map chest.
The second chest is more useful, giving us the big key, which we'll need to open the big chest and (after getting a light source) continue on to the boss.
Continuing on, skeletons appear out of nowhere in one room. Speedrunners have found that they're tangible before they become visible, and so you can hit them with pots or other projectiles before they appear. Just beyond them, the compass appears in its usual chest. Having the big key early means next opening the big chest early, but it's just Bombs. And without a light source, that's everything in the dungeon that's in logic for now. This trip was a bust!
We're running out of in-logic checks to do at this point. With over 500 rupees and the ability to lift rocks, though, there's always King Zora. Flippers without Gloves would also give access, through the whirlpool in Lake Hylia, but that's not relevant in this run.
The crabs along the way (which also appear along the shore of Lake Hylia) are more dangerous than they look, since they move erratically and inflict two full hearts of damage if you don't have armor to reduce that. Fortunately, they're also fragile when hit, and blue armor halves their damage anyway.
The ledge in the Zora area has a heart container piece as in the unrandomized game, not worth remembering for later collection.
(0:27:21) Ten Arrows? Scamfish scams again!
And King Zora himself sells us Hyrule's most overpriced arrows today. Well, that was a waste of time and money. But what else is left to check?
We've done escape, obviously... cleared out Kakariko and south shore... Sahasrahla and everything in Eastern Palace that's in logic... can't get in Desert Palace without the Book of Mudora... can't do anything in the Dark World without the Moon Pearl... can't go up the mountain (without going out of logic) without a light source... several silent minutes of racking my brains follow, and I ended up cutting them out of the video. This is definitely the low point of the run. Finally, though, I remember something I should have thought of much sooner. Boots! We have Boots!
(0:28:21) Dashing into the pile of rocks near
Sanctuary breaks down the pile and reveals a cave entrance.
(note that the timestamps given here are from the edited
video and don't include the awkward interval when nothing was
happening)
And so, to the Bonk Rocks. With the Boots, we can break down piles of rocks, and the one by the church hides another treasure chest.
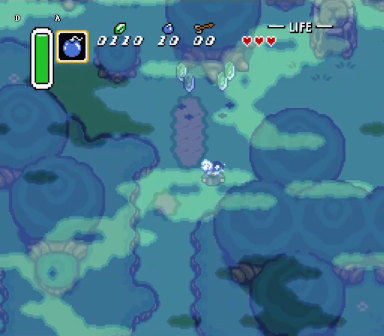
(0:28:28) The Moon Pearl! Praise the reflected light of the sun!
That gives us Dark World access, and that means tons of new things to check.
In the original game, to get to the Dark World, you need to beat Agahnim, and he'll drag you into it. To beat Agahmin, you need the Master Sword, and to get the Master Sword, you need all three Pendants. However, because the whole point of the Randomizer is that everything is shuffled all around, you're more likely to gain access to the Dark World through alternate routes first. Routes that require you to have items you normally can't get until after reaching the Dark World in the first place, like the Titan's Mitts. Which we already have.
(0:29:02) A quick trip past some heavy rocks just outside Kakariko, and Dark World, here we come!
Which means that with the Mitts and the Moon Pearl, we can head straight to the Dark World right now and not have to think about Agahnim at all.
With the forest right there, Skull Woods is a good place to start, but first, let's do a map check.
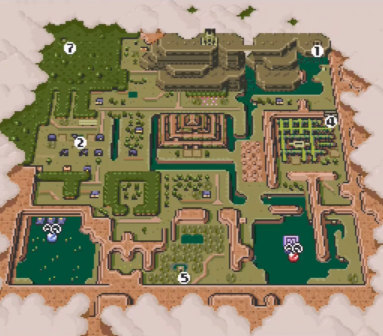
(0:29:23) Ah, the familiar Dark World map. This playthrough, Crystal 7 is in Skull Woods, Crystal 1 in Turtle Rock, Crystal 2 in Thieves' Town, Crystal 4 in Palace of Darkness, the blue Pendant in Misery Mire, Crystal 5 in Swamp Palace, and the red Pendant in Ice Palace.
We're probably not going to end up doing Misery Mire and Ice Palace, then. Swamp Palace may be slightly higher priority because it has one of two pieces that are needed to unlock the jumbo bomb and open up two more items at Pyramid Faerie. Though none of those are accessible yet anyway.
The Beginner preset uses 7/7 Defeat Ganon goal settings, which is a common option in races in general. The first 7 means that all seven Crystals are necessary to open up Ganon's Tower. The second 7 means that all seven Crystals are necessary to damage Ganon. Defeat Ganon means that you need to first clear Ganon's Tower to open the way to Ganon, then go defeat Ganon to clear the game. These are, in effect, the same settings as the original game uses, though it doesn't specifically require having any Crystals to damage Ganon if you somehow reach the fight without them.
There are several other goal settings available in the Randomizer. Fast Ganon works basically the same way as Defeat Ganon, except that you don't need to clear Ganon's Tower at all and can jump right into the fight as soon as you have enough Crystals and equipment. And at this point in the commentary, I get sidetracked by what's happening in the game and don't finish explaining goals until some time later.
However, for the sake of keeping everything together, here's the rest of the explanation. All Dungeons takes things in the opposite direction from Fast Ganon and instead requires beating every other boss, including Agahmin in the Hyrule Castle Tower, before fighting Ganon. There's also the Master Sword Pedestal goal, which flips the script by putting the Triforce there and making the Pendants required and Crystals optional unless they lock something important, instead of the Crystals being required to beat Ganon and the Pendants being optional unless they lock something important. Finally, the Triforce Pieces goal puts a number of Triforce pieces, 30 by default, into the general item pool, and requires you to find a certain amount, 20 by default, and take them to a custom NPC added in the Hyrule Castle courtyard to win. Ganon is irrelevant in these last two modes and can't be beaten even if you try fighting him.
Anyway, having the Cane of Somaria lets us shortcut the statue and button puzzle that normally leads to the big key of Skull Woods, since a block from the cane can hold down the button. Otherwise, it's necessary to drag one of the statues around while dodging enemies, and that's best avoided whenever possible.
(0:30:22) Half magic from the Skull Woods big key chest! Never essential, but always welcome. Praise the undead aesthetic sun!
It's not progression, but you never say no to effectively doubling your magic capacity.
After opening the chest, it's quicker and easier to Mirror back to the entrance. That's another way the Mirror comes in handy, beyond being required to reach some Light World locations. Runners fairly deep into a dungeon who want to return to the entrance quickly will often "take a death warp", a rather euphemistic way to describe dying on purpose to save and continue from the entrance. Using the Mirror avoids that, and is faster besides.
My first instinct is to head straight to the back of the dungeon, but without the Fire Rod, we can't get it open. Might as well clear out the rest of the front, then. Incidentally, the locked door by the exit that leads out toward the back of the dungeon is a waste of a key, so should never be opened.
The chest that opens pits in the floor when opened, the one in the Stalfos and Gibdo room above it, and the one in the bumper room to its right all have keys. Skull Woods is fairly key-heavy, and most of them aren't really needed if you route properly. For instance, by doing the bumper room last of those three, since it's the only one where the door shuts behind you, so you only need to use one key in the whole area.
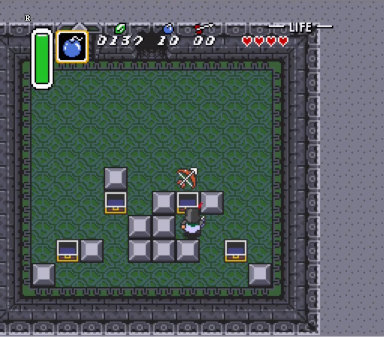
(0:32:43) The map chest contains the Hookshot! Praise the star tiles sun!
You're meant to step on the star tiles to move the pits around to get to the map chest, but it's quite simple to move diagonally between the two pits around the chest. Inside, we find the Hookshot, another important item! Skull Woods only has two items from the general pool, so that's everything we'll ever need from here, other than coming back with the Fire Rod to finish off the boss for its Crystal.
Next stop, Village of Outcasts! This isn't as item-rich as Kakariko village, but still has a relatively large number of checks in a fairly small area.
We'll start with the chest game, where we can open two chests for the price of 30 rupees. In the unrandomized game, there's a one-time heart container piece among the possible rewards, but whether you get it on any given attempt is purely a matter of luck. The Randomizer, unsurprisingly, randomizes the special item, and it's also more merciful about awarding it, guaranteeing the prize in one of the first two chests you open. It's just the vanilla heart container piece this time, but at least that's dealt with in one go instead of spending additional time and money here.
The C-shaped house in the northeastern part of town just has 20 rupees, and the sealed hut in the southern part, known as the Brewery, has another heart container piece. I'm still not sure whether it's (marginally) faster to jump off the ledge or walk down the stairs in there.
Runners typically check at least the first four chests in Thieves' Town at the point, and after getting scammed by Zora we need more money for the shovel game regardless, so that's our next destination. Without the Hammer, the big chest is unreachable, but everything else is available, and the boss does hold a Crystal.
The first chest has the compass. Speaking of compasses, if using a setting that shuffles them into the general item pool, they, like maps, gain an additional function. With those settings, having the dungeon's compass when you're in that dungeon will tell you how many item locations in that dungeon you've collected, and how many there are total. Although experienced runners pretty much have that memorized already, it's still something.
The second chest gives us just a single rupee. The third one, though...
(0:35:40) The Book of Mudora in the Thieves' Town compass chest! Praise the fire-breathing mohawk monsters sun!
By the power of literacy, we now have the means to enter Desert Palace (even if it is only a Pendant dungeon), and also read what's on the Master Sword pedestal and collect the items from the Ether and Bombos tablets once we get to them.
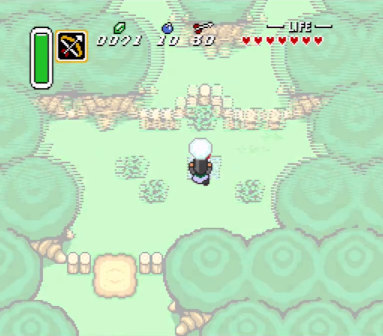
(0:35:45) Solaire's bunny sprite is... actually, I have no idea what it is. Any ideas?
Thieves' Town also has quite a few Bunny Beams, yellow swirls of energy that are able to temporarily negate the Moon Pearl's power and turn Link into a bunny. Or Solaire into... whatever that is. I'm not familiar enough with Dark Souls to comment. In any case, each custom player sprite also has its own version of bunny form, many of which are fairly amusing for those who are familiar enough with whatever's referenced (the SNES controller turns into an NES controller, for example).
Since the big key is necessary to go any further and hasn't turned up yet, it has to be in the last of the four chests in the front area, and so it is.
The front section of Thieves' Town is moderately prone to slowdown due to the relatively large number of enemies. When using the Randomizer's enemy shuffle option, that tends to make things worse, but that's not a concern for this run. Getting enough money to dig up a field later on is a concern, though, and the local Zazaks helpfully oblige by dropping large amounts of cash.
Past the so-called Hellway and up in the attic is another 20 rupees in the chest, but we're mostly here to blast a hole in the floor to set the stage for the boss fight later, as usual. The false maiden's cell in the basement has the randomized small key, which is slightly concerning. There's still one more item from the general pool unaccounted for in this dungeon, and it could be in the big chest. At this point, though, there's nothing to do about it beyond hoping that the boss doesn't have the map, which is also unaccounted for. Leaving an unknown item behind after clearing out the entire rest of the dungeon would be rather vexing.
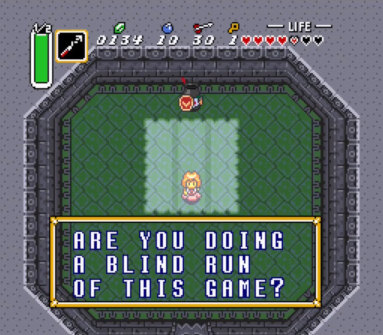
(0:39:17) Blind attacks with cringey wordplay! "Are you doing a blind run of this game?"
Blind is one of the few cases of the Randomizer keeping unskippable dialog, but it replaces the usual screeching about the bright light with a random selection of bad puns. Once that's done, however, Blind is one of the most predictable bosses in the game, and goes down with minimal trouble.
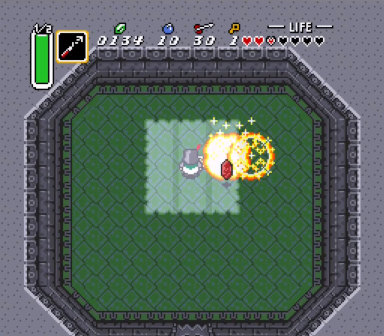
(0:39:44) Blind drops a red rupee, which is most assuredly not the dungeon map.
It's rarely such a relief to see a boss drop pocket change. That means the map is in the big chest, all items are accounted for, and we're done with this dungeon!
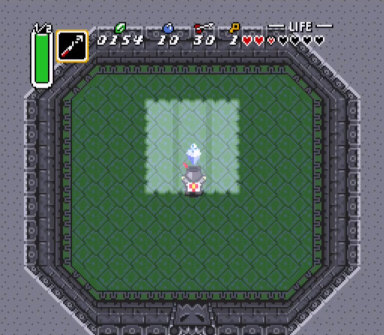
(0:39:48) One dungeon cleared and one Crystal acquired. Praise the sun!
After a quick water break, it's time to keep exploring. With a bit of money to spend, the digging game south of the village is a good place to start.
Like the chest game, this is another thing that the Randomizer made some anti-frustration changes to. In the original game, I believe the results are completely random for each dig, with the prize (a heart container piece) only possible as a reward once you've dug a certain number of holes. The Randomizer instead picks a random number within a certain range, applies that to the seed, and if you dig that many holes in one go, you're guaranteed the item. In this seed, the 25th dig gives us a red rupee, no better than the standard random rewards for any dig, but at least that can be checked off our list.
The archery minigame nearby is a good way to make some quick cash for anyone sufficiently skilled who needs the money, but with 171 rupees on hand and the most expensive checks already finished, we have all we should ever need. Instead, let's bring the frog smith back to his partner. The Titan's Mitts make this possible, and the Mirror makes it quick and easy.
Without the Mirror, it's still possible to reunite the smiths, just less convenient. Simply save and quit with the frog following you, and you'll restart in the Light World with the smith tagging along. The Randomizer makes two small changes to the base game's behavior that are relevant here.
First, you'll always start in the Light World when loading a game in the Randomizer unless you both have defeated Agahnim in Hyrule Castle tower and have the Mirror. The unrandomized game cares only about storyline progression and ignores your inventory. This makes perfect sense, since unless you're sequence breaking, you need the Mirror to reach Tower of Hera, you need to clear Hera to get the Master Sword, you need the Master Sword to defeat Agahnim, and you need to defeat Agahnim to reach (most of) the Dark World. In short, you can't legitimately reach the frog without the Mirror in the base game.
Second, because the original game doesn't anticipate the sort of sequence breaking that would let you reach the frog without first beating Agahnim, it expects you to restart from the world you saved in, so there's no logic to de-frog him if you save and quit from the Dark World but resume playing in the Light World. He'll still be a frog until you go through a portal to the Dark World, and then you need to save and quit a second time to return to the Light World again. The Randomizer avoids all this by adding an extra check to make sure that his form updates to match the world you start in.
In any case, the smiths in this seed only make Bombs, so nothing of importance there. This would be a good time to check the nearby Hammer Pegs in the Dark World and Magic Bat in the Light World, but without the Hammer or Powder, neither one is available. So that leaves Purple Chest, the locked chest that appears here in the Dark World after finishing with the smiths.
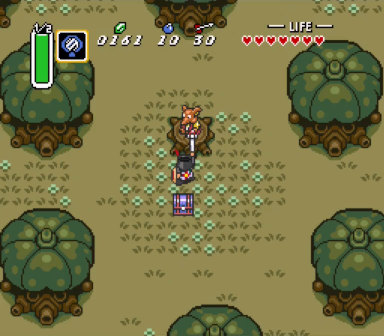
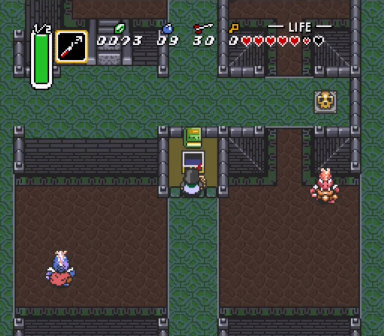
(0:43:16) Half-tree kid relinquishes Fire Rod without first accidentally burning down forest.
We stop to see Stumpy along the way and get the Fire Rod for our trouble. Finally, a way to light torches! However, at this point in the commentary I'm still so focused on explaining how the unrandomized game handles the frog/smith follower that it doesn't register and I fail to notice it until ten or fifteen minutes later.
The nearby Mirror-accessible Light World cave, dubbed Cave 45 after its label on one entrance map, just has some Arrows today. One thing to note if coming this way with a follower is that they won't follow you into certain caves, including this one. You can leave the chest outside and pick it back up as you leave, but be careful not to drop it too close to the Mirror portal, lest you accidentally warp back before it resumes following.
Also more or less along the way is Hype Cave, named for its tendency in earlier builds of the Randomizer to have an abnormally high rate of important items.
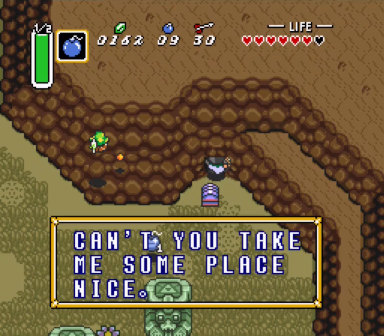
(0:44:37) "Can't you take me some place nice." Not even a question mark. Purple Chest is not feeling the hype.
This is another cave that the chest refuses to enter and needs to be left outside of. Though Hype Cave hasn't been as valuable on average since the item placement algorithm was revised, it's still five items, and skipping it would be foolish. And what are our five items this time? 20 rupees, 50 rupees, a heart container piece, a green potion, and another heart container piece. Half a heart container and another Bottle? Not useless, but no progression. That's good for maybe 2 out of 10 hype. Though, to be fair, we had a lot of front-loaded hype, with the early Master Sword, Blue Mail, Titan's Mitts, and Silver Arrows.
While passing through the marsh, I briefly consider doing Swamp Palace once the chest is open, forgetting for the moment that no Flippers and no Hammer means no Swamp Palace. And completely forget a different check in the area that's currently accessible and would be convenient to do now.
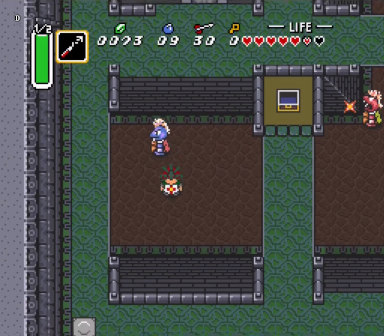
(0:45:46) The Tempered Sword! Praise the retired thief and mysterious locked chest sun!
The ex-thief by the desert entrance wordlessly (like most NPCs in the Randomizer) opens the locked chest to reveal the Tempered Sword! We're good on swords for the run at this point. Gold Sword is nice if you can get it, but much less of an upgrade than Master to Tempered.
I also briefly mention a minor glitch related to opening the locked chest. In short, if you leave it behind somewhere in the Dark World, the game doesn't completely clear the flags that indicate it's following you (and doesn't reset it back to its original location) until you return to the Light World or save and quit. If you dump the chest, remain in the Dark World, and only Mirror once you're close to where the middle-aged man is, that's good enough for him to load in with the version of his script that's responsible for unlocking the chest, and you'll be able to get its contents even though you left it behind.
With that done, it's time to take stock of our options. Swamp is a non-starter without the Flippers. Palace of Darkness is out of reach without either Hammer or Flippers... There are several other available options that slip my mind, but I end up deciding to go after a few more checks in the northern overworld.
Bumper Cave can't be crossed without the Cape, but the item is visible on the ledge outside, and it's an unimportant blue Boomerang. While in the area, and especially with Boots, it's also worth doing a similar visual check of Lumberjack Ledge in the Light World to confirm whether Hyrule Castle Agahnim will be required for that. Since you need to beat him to break down the tree and reach the item, runners prefer to see something as useless as possible there. It doesn't get much more useless than the single Arrow that's sitting up on the ledge inside the cave, so that's one less thing to worry about.
The mention of Agahnim reminds me that I never finished explaining goal settings, more than fifteen minutes earlier, and so I resume going over those while doing the checks in the area. On this page, I've combined this commentary with the onset of the explanation, near the beginning of Skull Woods above.
Graveyard Ledge has a full heart container, which is nice but not important. King's Tomb just has a red rupee. After wandering past those and finishing the goal explanation, I realize I'm not sure where I'm actually going anymore, and stop to take stock of the situation again.
Can't get to Palace of Darkness (except by glitching) without the Hammer or Flippers, can't go up the mountain without a Lamp, can't do anything else in Skull Woods without the Fire Rod, can't do Swamp without Flippers, can't get to Ice without Flippers unless I glitch, can't get to Mire without a Flute... Oh, right, I have the Book of Mudora, so that puts Desert Palace in logic. It's just a Pendant dungeon, but it's the green Pendant, which makes it more appealing, also having the Boots and Gloves means being able to clear out the dungeon completely, and in any case, getting anything done is always better than doing nothing. And with Tempered Sword, nine hearts, and blue armor, it should be a cakewalk—when going there in the original game, you'd normally have four or five hearts, no armor, and only a basic sword.
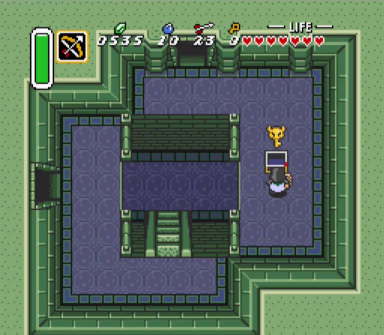
Custom player sprites all have their own "praying" animations to open the front door. If you're Solaire, you praise the sun. It's what you do.
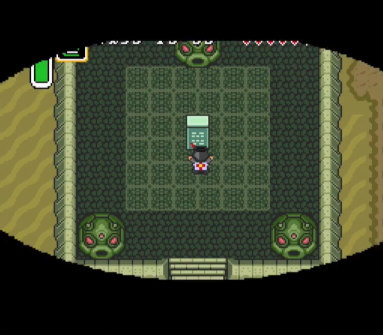
(0:52:28) To open the way to go forward, praise the sun! And it will be granted.
The map chest, which is always available as long as you can enter the dungeon in the first place, has a small key. This gives access to the right side, where the compass and big key turn up in their usual chests. That lets us open the big chest and head to the back of the dungeon, but first, one of the more interesting locations from a randomization standpoint.
One room in this dungeon has an item on a torch (the small key in the nonrandomized game) that you need the Boots to knock down. Depending on what's there, the Boots may or may not be logically required to clear the dungeon. This time, it's Bombs and therefore unimportant. If it were the big key, though, the Boots would be required to finish the dungeon, and therefore also for anything that's locked behind clearing the dungeon.
However, if the small key were there, that would make things particularly interesting, because key placement logic assumes that you might misuse keys in silly ways. For this dungeon, that means borrowing a key from the back section to open the right side when you need to beat the boss, or not doing that when you don't have the randomized key but do need to go into the right side. If the small key is on the torch, then the Boots are required to get it, and key placement logic dictates that both the boss and the right side—everything behind a locked door, in other words—is logically off-limits without the Boots. And, again, so is anything that needs you to beat the dungeon. If there were a Crystal on the boss, and the small key was on the torch, and this were still a 7/7 Defeat Ganon seed, then Boots would be logically required to enter Ganon's Tower, for instance, and couldn't possibly be inside there.
We find a mere 10 Arrows in the big chest, and 20 rupees outside on the ledge. That just leaves the boss. Along the way there, the tile rooms are trivial to rush through if you remember which pot has a key in each of them—bottom left in the first room, top right in the second.
When it comes time to light the torches to open the boss room, I finally notice that I have the Fire Rod. Good thing, too, or coming this far into the dungeon would have been a complete waste of time. I really should have confirmed that before entering the back section.
Anyway, having the Fire Rod... still doesn't put Eastern in logic because of the torchless dark rooms, even if Basic item placement didn't consider all dark rooms off-limits without the Lamp regardless. Never mind that, then.
Silver Arrows will one-shot the Lanmolas, but the timing can be tricky, so after landing just two hits on four attempts, I decide it's less trouble to finish the last one off with sword spins. Only the map as the prize, but that was the sole item in the dungeon not yet accounted for, so yeah.
(0:56:40) The overgrown worms were guarding a green Pendant, suitable for impressing a certain old man.
That's a second dungeon cleared, and our ticket to whatever Sahasrahla has, but unless that pays off, we've gotten no closer to our goal by coming here.
While leaving the dungeon, it occurs to me that we haven't checked the Bombos tablet. Unfortunately, without a leftover Mirror portal or at least the Hammer, there's no quick way to get there from here now, so it's time for another save and quit, and we'll go find out if collecting that Pendant pays off.
In the unrandomized game, you need to show Sahasrahla the Pendant of Courage to get the Pegasus Boots, which you need to bash the shelves in the village library to get the Book of Mudora, which you need to enter Desert Palace and make further progress. In the Randomizer, who knows what he has? It could be important; it could be junk.
And... he's hoarding a pack of Bombs. It's official now: Desert was a waste of time. Unless there's something amazing on the Master Sword pedestal. If nothing else, though, it made me notice the Fire Rod, so that puts Skull Woods in play.
A racer would almost certainly have gone up the mountain by now, especially with the Hookshot to cross the broken bridge, but I've decided to stay in logic, and the mountain is out of logic until you have either the Lamp to navigate the dark cave or the Flute to fly there. Since we have neither one, no mountain just yet.
One nice thing about Skull Woods, at least, is that because the final section is so separate from the rest of the dungeon, there's basically no replaying needed to finish it off. This is technically a double dip, that is, returning to a dungeon to clear it after starting and abandoning it earlier, but it doesn't really feel like that, and doesn't involve the same sort of time loss that double dipping most dungeons would. Cutting through to reach the back is quick and easy, and one Fire Rod shot later, we're in.
I skip the first chest for now, guessing that it won't be anything important (if I were tracking inventory better, I would have realized that we already found both of the dungeon's general pool items earlier, and that dungeon-specific items are all that remain, so that chest must necessarily be useless). There's a room full of star tiles and holes that I try to shortcut by crossing diagonally between two pits, but the enemies get in the way, I lose more health than I ought to, and end up just taking the long way through anyway.
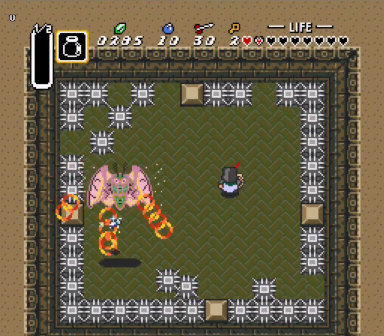
I'm careful not to get 1.0-ed on the way to the boss—there's an oversight in the original 1.0 version of the game, and not patched in Randomizer, that allows Wallmasters to grab you and take you back to the entrance while you're falling down a hole. However, the miscues earlier mean facing the boss with only 3½ hearts left to start off. The Mothula fight is notoriously chaotic, so that could be a problem. Hopefully having armor, halved magic cost, and Tempered Sword will be enough to compensate for that.
Unfortunately, Mothula has a problematic trait in that it's immune to spike damage. This would be fine if it weren't for the fact that when you hit an enemy into spikes, the spike damage replaces your attack's damage. Usually, that's to your advantage, but not here, and the room is full of spikes, so most of my Fire Rod shots go to waste, and before I know it, I'm out of magic and down to 1½ hearts. Could this be the end of this attempt?
Or maybe we have something in a Bottle that could help. That's what they're for, after all. Maybe a potion, or...
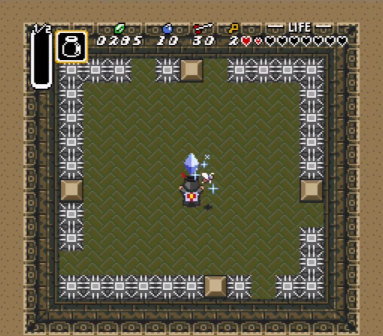
(1:01:48) We're still carrying around that "incidental" bee our uncle gave us way back at the beginning of the run.
Oh, that's right! Mothula is allergic to bees! Go get 'em, little buddy! I'll just be... over here dodging like a coward.
(1:01:56) Aggressive bee brutally stings giant moth into submission.
A victorious coward! Mothula drops the compass, which leaves the map and big key in the remaining chests, so we're all done here.
Mothula taking damage from bees is unique as far as Dark World bosses go. Bee stings deal fighter's sword damage, and every other Dark World boss (except Blind) is immune to that. Bees ignore Blind, though, and I think the same is true of all Light World bosses as well, which would make Mothula the only boss in the entire game that can die to bee stings. On the other hand, Mothula is normally immune to Gold Sword slashes (and Tempered spins) because they share a damage class with spikes. The Randomizer does something to correct that, and manages to do so without removing the spike immunity.
Skull Woods itself is also interesting as a dungeon, in that the only thing the big key does is open the big chest. It doesn't unlock any doors anywhere. In the unrandomized game, the Fire Rod is in the big chest, so you need it to clear the dungeon. When items are shuffled, though, the big key can easily end up being entirely unnecessary, and unless using the 100% Locations setting for Accessibility to guarantee that you can collect every last item and open every last chest, the Randomizer can even lock it inside the big chest itself! The Beginner preset uses 100% Locations, so in this run, the big key must be in the one chest in the back section, which means the map must be in the big chest because it's the only thing left unaccounted for.
(1:02:09) Solaire and the heroic bee celebrate their victory and claim a second Crystal! Praise our new insect overlords the sun!
Two Crystals down, five more to go.
Leaving Skull Woods with the Book and Mirror in hand is the perfect time to do a pedestal check. We can't claim the item without all three Pendants, of course, but the Randomizer customizes the inscription based on whatever the item is, so reading it lets us confirm what we could get here.
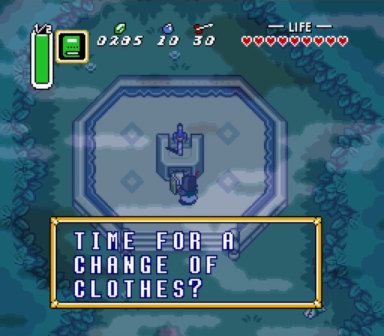
(1:03:00) "Time for a change of clothes?"
A change of clothes would be armor. I'm not happy about abandoning Red Mail, but it's just not worth it to collect all three Pendants solely for that.
At this point, we're running out of checks to do again. The only thing I can think of offhand is the Bombos tablet, so we'll head there before I forget about it again, and walk from here rather than saving and quitting because the village portal is the only one available without the Hammer, so it wouldn't save much time, if any.
Basically, you want the Hammer as early as possible to give you more access points to the Dark World and less trouble getting around within the Dark World. And, of course, it's as powerful a weapon as the Tempered Sword, if clumsier.
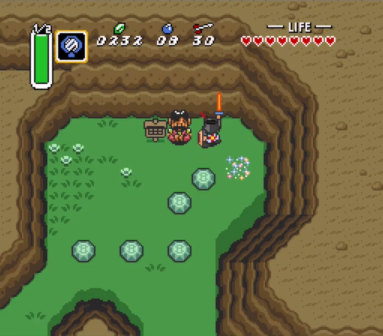
(1:05:13) The magical Flute of convenient transportation! Praise the explosions sun!
If we didn't have at least the Master Sword, reading the tablet would give a clue about what item was here, similar to the pedestal. With the Tempered Sword, the Flute just drops from the sky along with the usual pyrotechnics. And that Flute is just the thing we needed to open up all sorts of additional destinations.
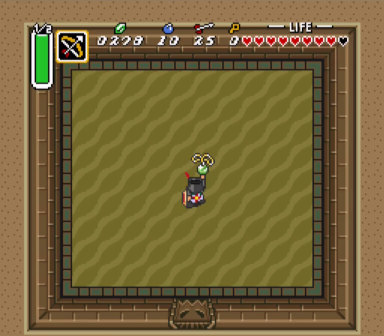
One save and quit and serenading the weather vane later, and we have fast transport all over Hyrule, including a few spots we couldn't get to before, such as mountain access. First, though, lets pay a quick visit to the Swamp of Evil in the southwest.
Misery Mire can't be cleared in logic without the Lamp, has only two items from the general pool, and is a Pendant dungeon anyway, so we won't bother with it. There are three other quick checks to do in the area, though. Mire Shed, the building next to the dungeon, has two chests, and they're just three Bombs and a red rupee today. Checkerboard Cave in the northeast corner of the desert, reached by Mirror, has even less value, with just a blue rupee. I only bother collecting it to show off the Mirror Block Erase glitch.
(1:07:40) Now you see it... now you don't.
Basically, when you push a block, it goes into a special transient state to move. Among other things, this lets you Hookshot or Fire Rod right through it while it's in motion. If you attempt to Mirror then, though, the block simply vanishes! Well, not exactly, but in effect. Apparently, using the Mirror resets some of the state information related to block pushing, which traps any moving blocks in some sort of weird limbo* state where they might as well not exist anymore. This only works inside caves, not dungeons (otherwise you would warp to the entrance, and the room would reset completely), and was patched after the Japanese 1.0 version of the game by making the Mirror only clear block state when used successfully.
* While recording, I completely blank on this word. The block goes to a sort of... uh... like the place between purgatory and paradise...? Which isn't quite right, either, but at least it's more on topic and less completely wrong than "libido", which is the first word that pops into my head while I'm trying to remember it.
There are a lot of things up the mountain, so hopefully that will pan out better than the last three checks. The Flute takes us right on up, and the old man is there in his cave to provide healing even though we haven't rescued him from the mountain access cave. (The game didn't anticipate being able to get there without going through that access cave, so his appearance in his home cave is unconditional, though we still need to backtrack and rescue him if we want to get his item and activate the mountain as a continue point. Of course, that's out of logic without a Lamp, but racers would typically go do it regardless.)
There's a heart container piece on Spectacle Rock, another one inside it, and a red rupee on Ether tablet. Nothing much, so we'll move on to the Tower of Hera.
The front basement has the map, so that's a quick nope. Ideally, at this point, the big key would be in the map chest, but it's the small key instead, which means the big key must be in the back basement, and so we need to go down there. Many runners would use the Herapot glitch instead to clip into the big pot, fall into the faerie room, and warp to the top, but aside from having decided not to go out of logic, I have yet to attempt that particular glitch anyway.
After collecting the big key, I Mirror to the entrance, because why would you walk back if you don't have to? Flipping the crystal switch upstairs to blue makes the rest of the floor go by quicker, and you can hug the south wall to pass some of the pits in the north room. We'll flip the switch at the end back to orange in case we need the health pots upstairs later.
The compass chest holds ten Arrows. I then try to Hookshot to the big chest, but get a bit too close to the pit and fall down two floors. Oof.
(1:11:58) Not even to Moldorm yet, and already taking unnecessary falls?
Normally, I would probably just rewind that, but that feels against the spirit of the recording, so back up the stairs it is! At least the enemies stay dead. Anyway, this time, the Hookshot crossing goes off without a hitch, and although the big chest only has the compass, it's just a quick dash and bonk off the chest to cross back over. Though after that excess fall, dropping down to the big chest in the first place as intended probably would have been faster in the long run.
(1:13:03) Bumpers aren't quite as big vertically as they look, and you can dash between this one and the pit above it.
One quick mini-shortcut on the floor above later, and we're at the top of the tower and the Moldorm arena. Moldorm is possibly the most unpredictable boss in the game, with an annoying tendency to knock players into the pits all around the arena. However, having the Tempered Sword is a huge advantage, letting us finish it off in just three hits, and it never even gets a chance to speed up. As you might expect, runners who have the Hammer without a high-end sword will typically bash the tail for that same three-hit no-speed-up kill instead of dragging the fight out with weaker slashes.
(1:13:35) Extermination complete, and we have our third Crystal.
No Hammer means no crossing the bridge at the top of the mountain. The Hookshot will get us across the broken bridge lower down, though, so let's head there. Spike Cave briefly crosses my mind, but we can't get in there, either, without the Hammer, and nine hearts with no healing or invulnerability seems inadequate regardless.
First stop: Paradox Cave. Named because the cave that's lower on the outside drops down into the one that's higher up the mountain, this one cave has an amazing total of seven chests, making it a prime destination in a Randomizer run. And it pays dividends right away.
(1:14:58) The Cane of Byrna! (1:15:00) And the Magic Cape! In the same cave, even! What are the odds?
That's both our invulnerability items at once. Spike Cave is suddenly looking more doable, except that we still need the Hammer to get past the entrance.
(1:15:24) Flippers! (1:15:28) And the Lamp! Praise the Zora artisans lampsmiths sun!
Aside from a full heart container, 20 rupees, and an empty Bottle, the upper cave has both the Flippers and the Lamp! Dear viewers, I think we've found the real hype cave. And I'm feeling so hype that I actually go for the Bomb Jump shortcut, even though I'm usually pretty lousy at those.
(1:15:44) The setup appears to be correct... (1:15:47) Success! And it shows off another one of Solaire's animation frames.
That saves something like 15 or 20 seconds of going back outside and in the lower cave entrance again. Only moderately helpful in a race, and almost completely pointless here, but it still feels good when goes off without a hitch.
Basically, the blast from an exploding Bomb will push you around, right over pitfalls if you position yourself and the explosion properly. Vertical Bomb Jumps are easier to set up because the explosion will be directly above or below you, and so push you directly up or down, if you just place the Bomb in front of you. Other angles are trickier, since placing a Bomb directly to your right or left will push you diagonally downward, as this particular case takes advantage of. Where you need a more exact angle (such as the Ice Palace Bomb Jump), the precision needed in the setup can be far more demanding.
Regardless, Spiral Cave is up next, and with the Boots, and to a lesser extent the Hookshot to mop up enemies, it goes by quickly and painlessly. There's just a heart container piece at the end, though.
But wait, there's more! With the Moon Pearl and Titan's Mitts, we can warp over to the Dark World and keep doing more checks.
(1:17:37) Just casually Hookshotting right through some blocks, no big deal...
Remember how blocks aren't quite solid while moving? We can take advantage of that here by using the Hookshot to shortcut through the blocks obstructing the passage in the cave. (Or, you know, just pull out the Mirror and remove them entirely.) The first set is easily bypassed by hooking to the second set, but the second set doesn't have anything beyond them to Hookshot to. No choice but to go up the stairs, right? Wrong! By pushing the left-hand block up first, then lining up slightly left of center when pushing the right-hand block, we can use the Hookshot to catch on the corner of the first block, then squeeze on through to the right just before the second block finishes moving.
Superbunny Cave (so named because you can drop into it, thus enabling the Superbunny glitch and letting you open the two chests even without the Moon Pearl) has another heart container piece and some more Bombs.
At the top of the mountain, we can see that the Ether medallion is required to enter Turtle Rock (which of the three spells open Turtle Rock and Misery Mire are randomized). We don't have that yet, but without the Hammer, we couldn't get in place to use it anyway, so it's just something to note for later.
The Floating Island back over in the Light World only has a heart container piece, so there's no need to go all the way through the back of Hookshot Cave to Mirror to it, and we'll just collect the chests in the main body of the cave. The first chest (which can be reached by dash-bonking, so can potentially contain the Hookshot, though presumably not under Basic item placement logic) holds some Bombs. The rest of the chests logically require the Hookshot, and in this run contain a red rupee, a piece of heart, and 300 rupees.
With not one but two invulnerability items obtained, I start to head over to Spike Cave, then remember we still don't have the Hammer, then decide to go ahead and show the sign placed by the tower before leaving the area. If you're ever not sure what the entry requirements for Ganon's Tower are, this sign tells you.
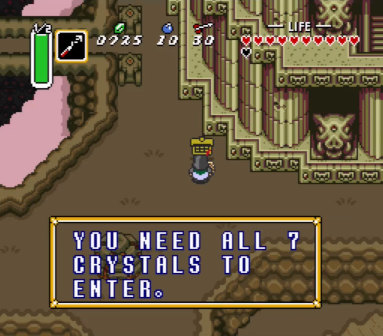
(1:19:46) The sign by the ominous tower reads, "You need all 7 Crystals to enter."
At this point, I Flute back to Kakariko, intending to head into the Dark World and cross the lake to the Palace of Darkness area...
...but decide to pause for a quick bathroom break first.
During editing, I cut out the interlude, since I'm not sure how to, or whether it's even possible to, pause recording in the Radeon software without stopping entirely and then starting a new recording... though maybe if I'd done that periodically the resulting video might have processed properly? Regardless, since there was no movement from before the break to after it, none of the standard transition effects available looked like anything was transitioning. So I applied some overlay text and a distortion effect that I kind of like how it turned out.
(1:20:25) The screen goes squiggly as time passes...
While I'm away, it occurs to me that it would make more sense to do some Light World overworld checks first. Does it count as cheating to think things over during a break? But this isn't a race, and even if it were, then that would have been several minutes of wasted time anyway, so I think I'm in the clear.
Along the way, I remember to check the stun prize. In the unrandomized game, enemies stunned by the Boomerang or Hookshot, or frozen if killed by anything but the Hammer, always drop a single rupee. The Randomizer randomly replaces this with any standard enemy drop, so it's usually something more helpful. In this seed, it's a small magic jar, which could be useful to keep in mind.
Tossing an empty Bottle in the Waterfall of Wishing gives us a replacement bee. Yes, the Randomizer even randomizes how each greater faerie fills Bottles. Their usual mechanic of upgrading specific items that you toss into the water is otherwise replaced by two treasure chests with randomized contents.
(1:21:25) Mmm... The smell of rotten fruit...
This time we get the Mushroom and what's now our twelfth heart container. Health shouldn't be an issue at this point. Trading in the Mushroom just gets us another heart container piece, but I use the opportunity to release the bee and buy two blue potions, just in case. There's not much else left to spend money on anyway.
Speaking of Bottles, the Randomizer has improved on how they behave in the menu. Instead of a moderately slow submenu automatically coming up that keeps you from moving the cursor up or down to another item, this menu now appears only if you press X while the cursor is on the Bottle slot, and you can also cycle through Bottles by pressing Y. Other items that share slots can similarly be swapped between with Y when you have both. Out of the menu, if using quickswap, pressing L+R has the same effect as pressing Y in the menu.
Let's do the Lake Hylia checks next. There's just a heart container piece on the island, so no need to go collect that. And the guy under the bridge, who kind of looks like a cyclops from the angle he's shown, hands over 300 rupees. Generous, but not particularly useful at this point.
Light World Flipper checks were pretty much a bust, so we're Fluting over to the village and returning to the Dark World to cross the lake, like the plan originally went. Ice Palace is in logic, but it's a Pendant dungeon and not especially item-rich, so we're putting it off for now and hoping not to need it at all.
Swamp Palace has Crystal 5, which along with Crystal 6 unlocks Pyramid Faerie, so we'll head that way first. Except, still no Hammer, so there's not much we can do in there yet. However, I forget about that requirement and keep going anyway, complaining along the way about how long it takes to get around the Dark World without the Hammer to use more convenient access points. Oh, the unintentional irony.
Swamp Palace, as you may recall from the original game, requires you to Mirror back to the Light World floodgate and drain the water there to drain the water in the dungeon entryway. The game has a hint about things in one world affecting their counterpart in the other world, but this is really the only place where that actually happens, which is kind of a shame. They could have done so much more with that idea. Mirroring is required, rather than simply draining the water once earlier on, because the water inexplicably reverts to its previous state when you leave the area.
The Hookshot works wonders against most of the enemies in Swamp Palace. Which is appropriate enough, given that the Hookshot is here in the big chest in the unrandomized game, and is required to clear the dungeon. Because of that, racers tend not to come here until they have the Hookshot, though every so often the Randomizer is feeling mean and puts the Hookshot in one of the chests here that you can get to without it.
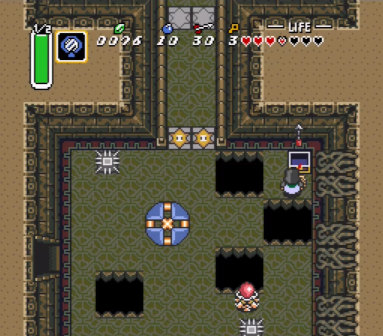
Because the stairs down from the entry room are locked, the first chest in Swamp Palace must always be a key unless using a setting that either shuffles keys outside of their dungeons (like Keysanity) or that makes keys a universal resource shared across all dungeons (typically Retro mode).
(1:26:25) Through the Bombable wall, the Ice Rod!
The second chest contains the Ice Rod. That's not immediately useful, but it will be necessary to beat Trinexx later, and it's reassuring to find it along the way and not have to go on an Ice Rod hunt at the last minute. Since Trinexx is literally the only thing in the game that requires the Ice Rod, it can appear anywhere that you can get to without clearing Turtle Rock. Maybe in the depths of a Pendant dungeon, or on the Master Sword pedestal if that hasn't been ruled out. It happens often enough that hunting down any similarly elusive required item (like castle tower keys in All Dungeons Keysanity) is often referred to as an Ice Rod hunt.
However, to continue on, we need the Hammer to get to a water drainage lever, as I only remember upon reaching it. In that case, it's Mirror time!
Visiting Swamp Palace at this point was a bit of a time waste, but we didn't go very far into it, so it's not that bad. And the lake that we were planning on crossing in the first place is right nearby, so let's get to it!
As I mention in passing, the cluster of three caves reached from the southeast shore of the lake has been nicknamed the Dark World Shopping Mall. Under typical settings, there's no point in going there, so we don't in this run. However, when entrances are shuffled, or in Retro mode due to it replacing a few randomly selected insignificant single-entrance locations like those with prize caves, three entrances in one place (or six, if you have the Mirror) can make it important.
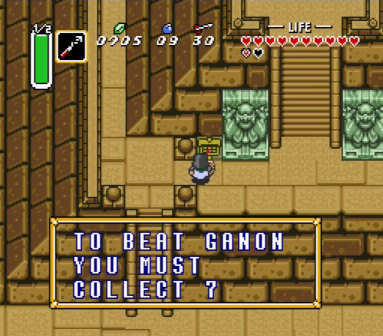
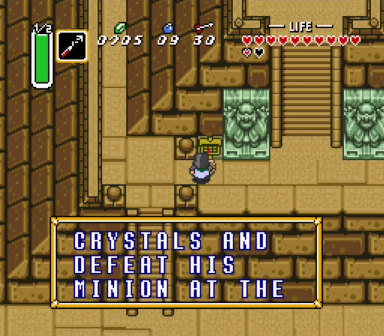
(1:28:20) Full message: "To beat Ganon you must collect 7 Crystals and defeat his minion at the top of his tower."
Similar to the sign it adds next to Ganon's Tower that lists the entry requirements, the Randomizer adds a sign to the pyramid that lists the goal for the seed. Since we know we're playing on the Beginner preset, we already know the goal is 7/7 Defeat Ganon, but there are also ways to get seeds with randomized settings, so it's not always the case that the runner knows the goal ahead of time, and finding out can be a key piece of information. To give an idea of what that's like, I like to play with a randomized player sprite, so I didn't know I would be playing as Solaire until starting the game. Imagine something like that, but affecting the settings for the actual content of the game, and then not knowing what those settings are until finding out while playing.
The item on the pyramid in this seed is 50 rupees, and we can't get in to see the Pyramid Faerie yet, so we'll continue on to go annoy the catfish. In the unrandomized game, that's where the Quake medallion comes from, but this time, it's just a red rupee.
While heading back toward the Palace of Darkness, I start off from the concept of mystery seeds (ones where you don't know the settings ahead of time) to launch into a tangent about some of the other possible settings in the Randomizer, in particular, the Nightmare preset, which lives up to its name. Among the effects of that preset are that enemies are shuffled, and have randomized health and damage, both typically significantly higher than usual (bosses still don't have health or damage randomized, but which boss appears in each dungeon is randomly selected). There are no swords. Item availability and functionality are severely restricted. All the dungeon items are shuffled into the general pool. And perhaps worst of all, the entrances are shuffled so chaotically that you can walk into an entrance, walk back out the same entrance, and find yourself somewhere completely different from where you originally entered. If planning on attempting a seed like that, be prepared to take copious notes, even more so than on a more restrained entrance shuffle.
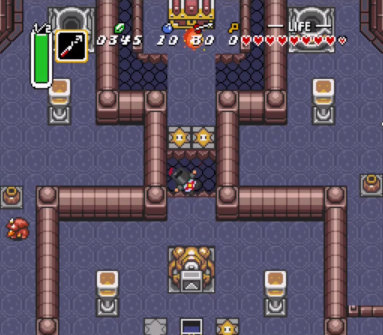
On the way through the hedge maze, Kiki the monkey appears out of nowhere as usual, then takes 10 rupees without asking, and finally swipes another 100 rupees to open the dungeon entrance, in accordance with the usual Randomizer tendency of skipping prompts that you're expected to agree to anyway.
Going into Palace of Darkness without the Hammer is less than ideal, but it has a large number of items inside, and with the Mirror, Eastern Palace is right there to finish off on the same trip. For reasons that I don't mention and can't recall, I decide to check the first few chests in PoD first, though in retrospect, we already have everything we need to clear Eastern, and we'll need to clear it for its Crystal anyway, so going there first to begin with would seem to make more sense, yes?
Regardless, the shooter room has our thirteenth heart container and leads to a quick Mirror out. Continuing into the Bow-locked right side (where you need the Bow to get anywhere unless enemies are shuffled or you're willing to use one of at least two possible glitches to sequence break), we find two keys, and can't continue any further without the Hammer. At this point, especially with this early key generosity, I'm beginning to suspect that may be in the dungeon itself, but decide it's time to go clear out Eastern Palace rather than tempt fate any further.
On that note, whenever you're able to combine Eastern Palace and Palace of Darkness, or other pairs of locations that share the same space in different world, it's a big time saver to do so. Other examples include the Catfish and Zora checks, Desert Palace and Misery Mire, and Tower of Hera and Ganon's Tower.
We've already done most of Eastern Palace and found all the dungeon items, so the one remaining chest and whatever the boss has both have to be from the general item pool. I can't justify skipping the big key chest, even if it is rather out of the way. If I hadn't decided not to sequence break, I would have gotten it the first time here, but it turns out to be just a red rupee regardless. I do, however, use the standard speedrunning strategy of taking damage near the anti-faerie cluster to walk through it and step on the button to make the chest appear without clearing the room of enemies. With an armor upgrade and thirteen hearts, avoiding damage here is hardly a priority.
The room leading upstairs, as I note, is also doable in the dark, though it's trickier than the dark rooms leading to the big key chest. After all, it has more moving parts, and you need to kill one of those moving parts to get the key. It's not something I enjoy trying, and with the Lamp I don't have to, but runners do it fairly regularly. Upstairs, there are a few minor tricks to make things go quicker, like knowing which pressure plates to step on and rushing past everything else in those rooms, and walking into the room before the boss with a spin attack readied to take out all the tentacle monsters right away. The red eyegores in the same room are trivial with Silver Arrows; without them it's still possible to take out both in one pass by waking both, shooting one of them once, quickly shooting the other twice, then hitting the first one with another arrow just before it goes back to sleep.
And then we finally reach the Armos Knights. There are several quick-kill tactics that revolve around finishing off the last two more or less simultaneously to avoid letting the last one go into rage mode, but I haven't practiced any of them, and with Silver Arrows, none of that matters anyway. Six shots later, and they leave behind another red rupee. No Hammer here, then. However, we did need that Crystal, so it's time well spent.
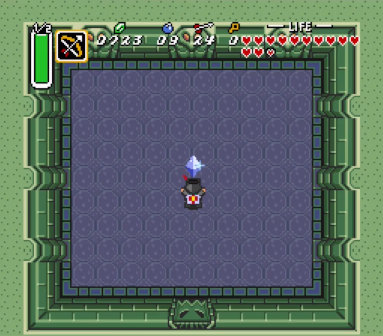
(1:36:21) Slaughtering the Armos Knights gives us our fourth Crystal.
Well, back to hoping the Hammer is in the Palace of Darkness, I suppose. The keys let us go in through the front door, where we find another key in the chest near the one we got from the Bow-locked side. Continuing on, the dark maze has a heart container piece, and, I knew it...!
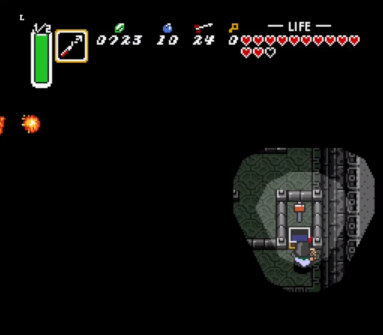
(1:37:53) The Hammer was in the second dark maze chest! Curse the lack of sun!
Yes, it was a French vanilla Hammer all along. That... may need some explanation. "Vanilla" in a modding context means something that's not modified, so the unrandomized game itself is vanilla, if the Hammer were in the big chest here that would be a vanilla placement, and so on. French vanilla, in a Randomizer context, is when something is not quite vanilla but close enough for most practical purposes. Like finding the Hammer one chest away from its vanilla location.
Without the big key, we can't open the big chest just yet, so maybe it would have made more sense to wait a bit on the dark maze. What's done is done, though, and the Hammer is an important enough find that it's hard to mind. Moving on, the compass chest has another key, and the dark basement (which is a good place to get some extra money if you need any) has another small key and the big key. Definitely should have come here first. Oh, well. With the big key in hand, backtracking to the big chest gets us the Shovel.
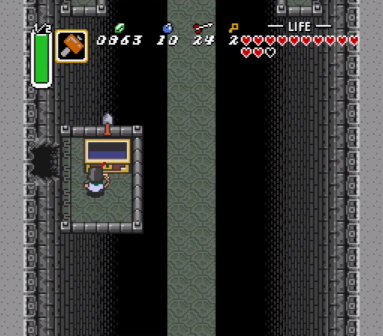
(1:39:30) Hey, who put a Shovel in the Hammer chest? They're not the same thing at all!
The Shovel is generally not an essential item. It does let you dig up the usual Flute spot, which of course has a randomized item, but unless there's something important there, it's not required. The Randomizer at least makes it more than a single-purpose item by adding the ability to dig up random supplies anywhere you can dig. I also take the opportunity, since the Flute and the Shovel share an inventory slot, to demonstrate swapping between the two as described earlier.
The dark maze, incidentally, is probably the worst room in the game to navigate without a light source. Runners do it fairly often, but it's already easy enough to take a wrong turn even when you can see what you're doing. You'd need the layout pretty well memorized to get through in the dark.
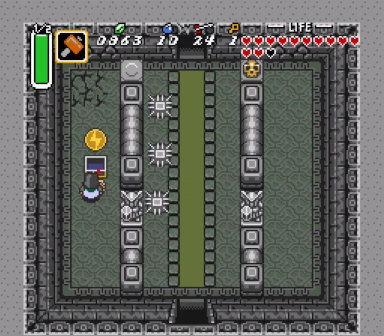
(1:40:06) The Ether medallion! Praise the harmless spike traps sun!
Harmless Hellway has the Ether medallion, which will get us into Turtle Rock, and with only that, the rest of this dungeon, and Swamp Palace to go for Crystals, that should be everything we need to clear the seed, though it takes me a while to realize we're now in what's called Go Mode.
Heading toward the boss, there's a curious little shortcut we can take using Boots recoil.
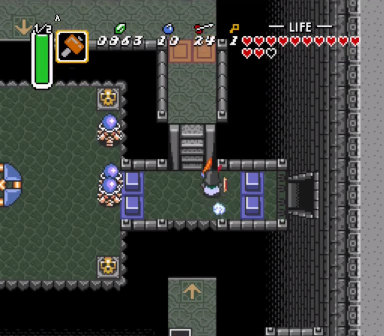
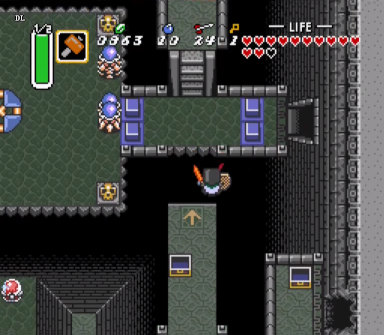
(1:40:23) Just casually bonking our way up a down jump, no big deal...
Slamming against the side of the stairs gives just enough knockback to land on the upper platform, though you need to be holding down and probably left to avoid slipping off and into the pit right away. From here, arrows and a few other projectiles can sneak between the chest and the wall to hit the crystal switch. First, though, I decide to check the remaining chests, because I still haven't noticed that we're in Go Mode, or even that only dungeon items are left to collect here. The big key chest just has the compass, and the chest below it refunds the key we just used. We'll need that key to get to the boss.
The cyclops statue along the way to the boss is the one and only place that absolutely requires a Bow under all possible Randomizer settings. A number of other rooms are normally logically Bow-locked due to the monsters inside, but when using enemy shuffle, that's not an issue. This statue is unaffected and always hard-requires a Bow, no matter what.
I don't feel like struggling with the turtles in the dark room, so I flip most of them over and use Bombos to take them all out at once. We have magic to spare.
Shortly after that, we come to the Helmasaur King. I mention at this point that, although reaching him normally requires the Hammer anyway, this isn't necessarily the case when bosses are shuffled. However, you don't need the Hammer to get through the mask. Bombs will also work. It's not quite as fast, but it can also be somewhat safer if you're not confident. Here, I use the Hammer. And once the mask is off...
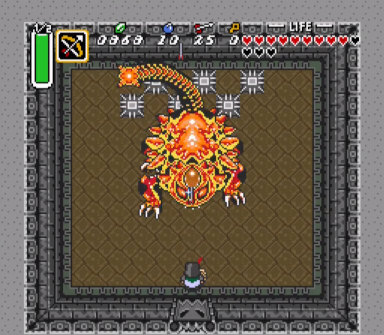
(1:44:30) Boom, headshot! Other than enemies that are completely immune, Silver Arrows one-shot nearly anything, including several bosses.
...Silver Arrows trivialize the rest. The boss drops the dungeon map, which is the only item not yet accounted for.
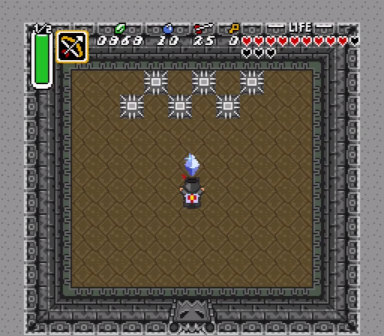
(1:44:44) With the giant mutant scorpion beast dealt with, that's our fifth Crystal. Two more to go!
That leaves just Swamp Palace and Turtle Rock to go before heading to Ganon's Tower.
But first, let's check on that digging spot. It's more or less on the way to Swamp anyway. Digging up the flowers in the forest grove gives us our fourteenth heart container, which is certainly welcome, though it should be entirely unnecessary. Incidentally, some of the bushes at the entrance to the grove have a 50-50 chance of hiding Bombs underneath, so if you need some, especially early on, that's a good place to look.
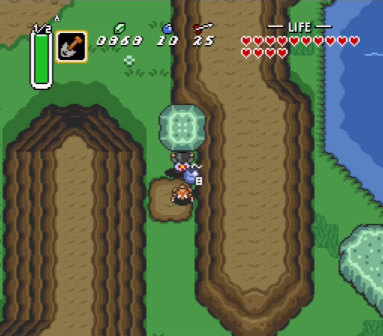
(1:46:14) Our Hoarders are hoarding explosives.
Speaking of Bombs, we come across a Hoarder, popularly known as a bush crab, along the way to the dungeon, and it starts tossing out packs of eight! Like tree pulls and stun prizes, these also have their items randomized, which can make them a valuable source of supplies, if you remember to check on them.
Once again, we have to re-drain the lake and refill the interior waterway from the Light World floodgate to enter. The Randomizer overrides this behavior only if entrances are shuffled, which would mean that the floodgate and Swamp Palace could be anywhere, typically not in the same area as either each other or the swamp itself. With those circumstances in play, the water stays drained permanently once you pull the lever the first time, otherwise getting into Swamp Palace would likely become impossible (this can also make the floodgate itself a sort of Ice Rod that needs to be hunted down late in a seed).
Having already been here before and cleaned out the first few rooms, we can rush straight to where we need the Hammer. The compass then turns up in its vanilla location, and then as I'm trying to decide whether to clear out the left side of the dungeon, I finally notice that we're in Go Mode, missing only the Boomerangs, Magic Powder, Quake medallion, and some health and equipment upgrades. That makes it an easy decision. The final sword upgrade would be nice, but it's hardly essential, and we already know the second armor upgrade is on the pedestal and effectively out of play. Nothing else matters much now.
Go Mode means we have everything we need to clear the seed, and so don't need to spend extra time checking every possible item. If there's something unaccounted for that would be nice to have, like a sword upgrade, it may be worth grabbing anything that's along the way, but other than that, the best move at this point is to rush through everything and skip anything skippable.
When not in Go Mode, the question of whether to do the left side of Swamp Palace becomes a more difficult one, with a large risk/reward factor. Swamp is fairly item-rich, with six items from the general pool, but two of the chests, on the left side of the main floor, are fairly remote and add significantly to the time it takes to go through the dungeon. If you go collect them and they turn out to be unimportant, you've just wasted that time, but if you skip them and they turn out to be required, you'll end up wasting more time in the long run. But if you're already in Go Mode, you know they're safe to ignore.
There's also a glitch called Diver Down that runners often use in Swamp Palace to jump through railings and into flooded areas, where they can then walk around freely because the game didn't anticipate that being possible and only initiates swimming when you go in from the intended access points. However, that's one of the glitches I've never practiced, and it's not that much of a time save regardless, so I mention but do not attempt it.
Swamp Palace is another dungeon like Skull Woods where the big key does nothing at all except unlock the big chest. In the unrandomized game, that contains the Hookshot, which you need to continue deeper, but with items shuffled, that's unlikely to happen. Like in Skull Woods, the big key can even be locked inside the big chest, forever unreachable, unless using the 100% Locations setting for Accessibility.
The chests in the flooded room downstairs aren't too far out of the way, so I give them a look, but they're just the vanilla red rupees. Waterfall chest, revealed by pushing a block in the room full of waterfalls, has the map in this playthrough.

(1:51:42) Boom, headshot! Like the Helmasaur King, one Silver Arrow is enough to finish off Arrghus once the main body is vulnerable.
With the Tempered Sword to one-shot the puffs and the Silver Arrows to one-shot the core, Arrghus is trivial. Its dropped item is similarly trivial, just a blue rupee.
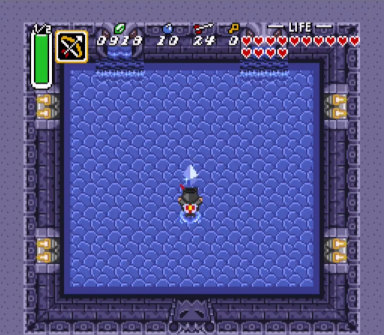
(1:51:51) That's our sixth Crystal. Only one more to go!
With Crystals 5 and 6 acquired, the jumbo bomb and Pyramid Faerie are in play, but we're already in Go Mode, so we'll ignore that and head right for the last Crystal. And Turtle Rock makes an ideal location for the final Crystal, since it's just a few screens away from Ganon's Tower, where we'll need to go next.
On the way up the mountain, I briefly demonstrate the Hookspeed glitch. In short, if you select the Hookshot when you have the Boots and press Y and A simultaneously, Link goes into a glitched state in which he can't swing his sword. Touching the top or bottom of a stairway like those on the mountain slopes when in this state then puts Link into a different glitched state in which he moves at Pegasus Boots dashing speed, but can maneuver freely in all directions. Taking damage, jumping off a cliff, changing screens, or pressing A again cancels either glitched state. An alternate setup for the same glitch, called Spinspeed in this case, occurs by using a spin attack and pressing A exactly one frame after releasing B. I find Hookspeed easier to do reliably. Both were patched out of later releases of the game, and only work in the original Japanese 1.0 version and mods based on it (like the Randomizer).
The pile of rocks in the Light World on the approach to Turtle Rock always has a faerie underneath, which it doesn't hurt to keep in mind. Then we just solve the usual peg puzzle, warp onto the turtle's back, and use Ether, not Quake, to open the dungeon, as the marked spot indicates in this seed.

(1:54:22) Casting Ether to open the big turtle.
Also, the turtle's eastern paw is a tree pull spot that's easy to overlook. Potentially useful, depending on the prizes.
Inside, Turtle Rock is one of the longest and most time-consuming dungeons no matter what you do, even if in Go Mode. There are no significant shortcuts to take (except potentially under alternate settings that may make it possible to get in through the other entrances), and right away, we need to find a small key to continue. The spike room has the map, so that's not it, and we'll have to go through the room that requires the Fire Rod. There's a small time save to be had here by lighting all four torches immediately, then Hookshotting to one of them to fall in the pit and land back at the entrance to the room to go through the door before it closes, without having to ride the platform the long way around. The room beyond has both the small key we'll need just ahead and the big key, which we'll need further in.
While riding on platforms in areas with monsters floating around, it helps to have sword beams available. In other situations, they can be either a blessing or a curse. The free long-ranged attack is always nice, but it's also weak, and has an annoying tendency to take precedence over your slash even when enemies are in melee range, cheating you out of the higher damage of an upgraded sword.
The chain chomp room, one of the deadliest ones in the game thanks to their erratic movements and high damage, has another key, which we need immediately to go downstairs. Forgetting that we already found the big key, I head to the lava chest and only get a compass out of it, effectively wasting a key that could have saved a bit of trouble later on. I also go ahead and Mirror over to Mimic Cave in case that's a sword, but it just has a heart container piece.
Speaking of Mimics, sometimes you can get them to move by pressing directions while you're grabbing onto something. Other times, they stay still. I'm not sure of the details, but I suspect that it has something to do with how you're moving when you grab, and the game getting confused into thinking you're still moving even though you're not. Regardless, it's an easy way to maneuver them where you want them.
The big chest has another key, which we're going to need. The roller room (where you can jump over the roller by dashing into the wall) has a heart container piece, which is enough to finish our fifteenth heart container and provide some convenient free healing. The dark room downstairs with the platform rail maze is another of the trickier ones to do without a Lamp (thankfully not an issue this time), but it's not really as difficult as it may look.
Having wasted a key earlier, we now must brave Laser Bridge and search those four laser-guarded chests for the final small key of the dungeon. It's possible, with careful positioning, to slip past the lasers without getting hit, but it's less trouble to just use an invulnerability item, or block the shots if you have the Mirror Shield. I believe the Randomizer logic requires one of those items to consider these chests in logic. Either way, they have another heart container piece, a full heart container to give us a total of sixteen, the Quake medallion, and finally that key.
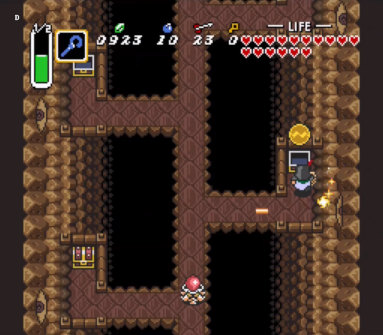
(2:01:45) This late into the run, and with no need to worry about entering Mire, Quake isn't terribly exciting, but hey, it's still a unique item.
At this point, there's the option to Bomb open the wall at the bottom of the corridor to go outside and update your entry point in case you don't survive the boss fight. With armor, half magic, and sixteen hearts, though, that shouldn't be an issue, and I don't even think to mention it, much less go through with it.
With the Tempered Sword, each of Trinexx's side heads takes five slashes, which means they'll need to be stunned at least twice each, using the Fire and Ice Rods. Not a problem with half magic and the full magic recovery jar outside the boss room. You can speed up the fight slightly by dashing up to the top left and stunning the fire head as it begins moving at the beginning of the fight. Other than that, the first phase of this fight is mostly dodging and trying not to miss. In the second phase, you can and should attack the head until the middle starts flashing and becomes the only vulnerable point.
Once defeated, Trinexx drops ten Arrows in this seed. It's worth noting that the item appears in the middle of the room regardless of where the boss ended up; otherwise, there would be the possibility of it getting stuck in a wall.
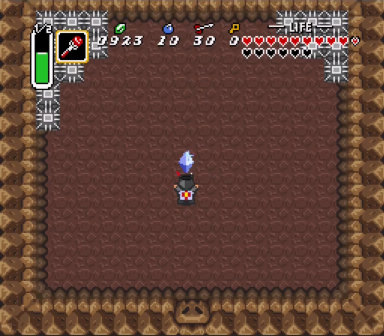
(2:03:40) Finally, the last Crystal! Next stop, Ganon's Tower!
And with that, we have all the Crystals and can move on to the endgame.
At this point, if this were a race hosted with commentary, it would be time to start the Ganon's Tower big key guessing game. The big key is required to ascend the tower, and (unless shuffled into the general item pool) must appear in one of the 22 item locations in the basement other than the big chest. Race spectators are asked, in the time between a runner first getting enough Crystals and one actually opening the tower, to guess how many checks the first runner into the tower will have to do before finding it: 1 if it's the first place they look, 2 if the second, all the way up to 22 (typically Tile Room) if they end up doing literally every other check first. Winners get Twitch channel points. There's no race here, and no channel points, but feel free to make a guess anyway!
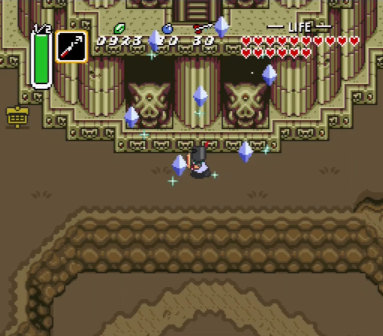
(2:04:24) The Crystals rising up and circling to open the tower is one of those cutscenes that isn't particularly complicated but makes an impact anyway.
This run, our first two checks are in Hope Room, down the right-hand staircase, and both are red rupees. Without a key, there's little point in continuing right, so we'll head down the left-hand stairs instead. (Incidentally, there's a locked door between the two rooms that's a waste of a key to unlock.) Our third check is then the item on the torch, a small key this time, and we'll take that. Checks four through seven are in the Stalfos room, and have the Mirror Shield, the map, a small key, and ten Arrows. Our eighth check, in the firebar room, has a red rupee. Through the teleporter and past the fire snakes, we find another small key for our ninth check.
Next up is the Randomizer Room through the Bombable wall in the teleporter maze, or Rando Room for short. This was so named either because it's normally a bunch of random junk or because there's no real point to going there except in a Randomizer run. Or maybe both. Blue rupee, ten Arrows, red rupee, 100 rupees. Those are checks ten through thirteen, and they're random junk, if not the same random junk as in the unrandomized game.
The room ahead has an invisible walkway over a pit that you're supposed to navigate by lighting a torch to make it visible, but there's a much easier way. Just bonk off one of the skulls, or use a Bomb Jump, to skip right to the end, and don't bother with the maze at all!
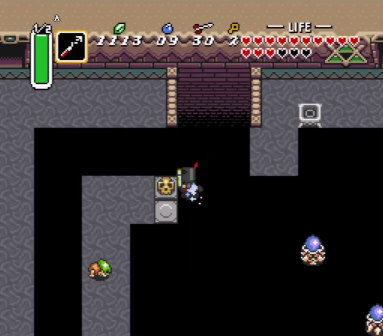
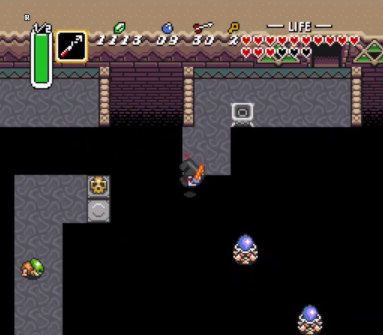
(2:08:36) Just casually bonking past a puzzle element like it wasn't even there, no big deal...
Check number fourteen is Bob's chest, and contains 50 rupees. Bob is the antifaerie in the bottom right corner of the room above the Armos Knights rematch, and has a special place in the Randomizer community because of an oddity that causes his appearance to glitch, apparently by using an incorrect palette, if you left the item on the torch earlier in the dungeon (which in turn makes that Bob's torch). This was fixed at one point, but the fix has since been deliberately removed by popular demand. Bob's glitched appearance never shows up in this playthrough, though, because we "killed" him by collecting the key from the torch.
Down the hole, the Armos Knights are as trivial as ever with Silver Arrows, ice or no ice. Beyond them, the fifteenth check has 50 rupees, and the big key is number sixteen. If you guessed 16, you were right! Since another chest is just a few steps away, might as well grab it. 300 rupees, worthless at this point.
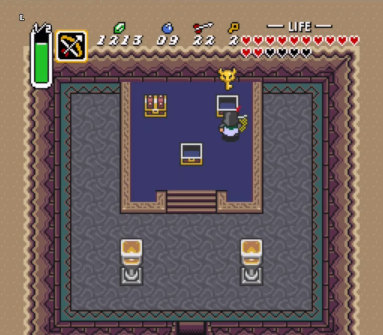
(2:09:22) The Armos Knights guarded the big key, as in the unrandomized game, so either route through the basement would have had similar results.
Time to Mirror out and head up the tower!
(From the spoiler log, in case anyone's curious, the tile room chest had a red rupee, and the compass room had two pieces of heart and 20 Arrows.)
There's a statue in one of the rooms with Mimics that you're meant to use to dampen your movements while you maneuver the Mimics into place, but most runners will use sword slashes to get similar results. The slash interrupts your movement, but not theirs as long as you keep pressing a direction. As usual, Silver Arrows make short work of them, and the Mirror Shield means their fireballs aren't a threat even if they get a chance to shoot any.
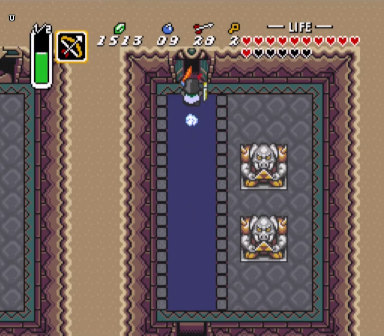
(2:10:35) Dashing right through a locked door without stopping.
On the way through the big key door, I accidentally pull off a keydash. Usually, if you dash at a locked door that you have a key for, you'll bonk into it as you unlock it. However, when dashing north, if you're an exact multiple of four pixels from the doorway, you'll unlock the door just before running into it and pass through without stopping. This is fairly easy to do by starting the dash while up against a wall, pot, or other fixed object. You can do that here deliberately by lining up against the south wall before dashing, but that's not what happened this time; I just walked into the room, started dashing, and happened to luck into it.
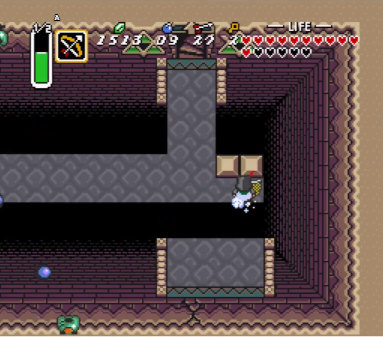
(2:11:06) The only place the original game seems to expect a bonk jump, and it's entirely optional.
Shortly after that comes a spot that's particularly interesting in that it's the only place where the original level design clearly demonstrates awareness of other ways to cross pits besides the Hookshot. Dashing into the blocks apparently provided for just that purpose is the easiest way across, or a Bomb Jump or Hover will also work. The room behind the cracked wall has two Faeries and a full magic refill, so it may be worth a visit if you're running low.
Next up is The Gauntlet, a series of rooms with randomly moving monsters (Stalfos and Zazak) on awkward terrain (like conveyors, spikes, and ice) that need to be cleared out to open the next room. It goes smoothly enough, though I'm sure having reasonably good equipment has a lot to do with that.
Past The Gauntlet comes the Lanmolas rematch. The fireballs coming out of the corner hardly make any difference, and I nail the first two with Silver Arrows before narrowly missing the third on the first attempt, then get it on the fourth shot when it comes back up. That went better than the first time.
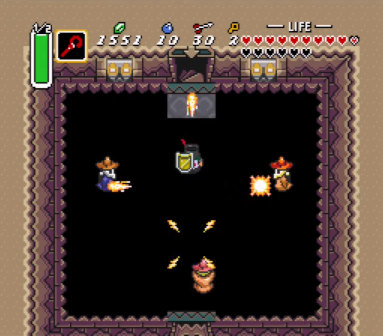
(2:13:04) The Cane of Somaria makes short work of Wizzrobes.
Up the stairs is a Wizzrobe room that a single Somaria block clears out in quick and satisfying fashion. A couple of rooms later is another Wizzrobe room where adept block usage can similarly take out three at once while you slash the fourth, though I still haven't quite gotten the hang of that last step.
The torch puzzles in the upper tower can all be done with just the Lamp, though the Fire Rod of course makes them easier.
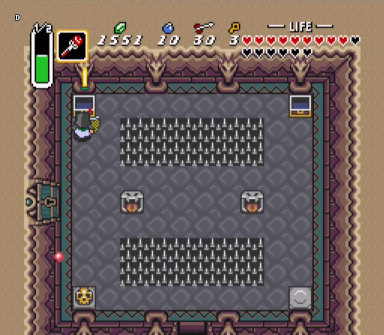
(2:14:15) The ultimate in melee offense in one of the last few chests. Praise the shiny sword sun!
I haven't stopped opening chests yet, just in case something useful comes out of one, though a racer who already has the Tempered Sword and Silver Arrows would most likely not bother. But checking pays off in this seed. Although the first chest in the Mini Helmasaur room just has some Bombs, the other one has the final sword upgrade! Hardly essential, but it will make Ganon a bit less trouble. And with that, and especially after having a bizarre amount of difficulty blowing open the wall into the room, the next chest no longer seems worth bothering with. Just about the only thing that could possibly help at this point is another armor upgrade, and we already know that's out of play. (The spoiler log says the chest here just had a key anyway, so, as expected, completely useless.)
Then Moldorm promptly knocks me out of the arena in the rematch. Annoying, but after climbing back up, it only takes two slashes from the Gold Sword to finish it off. I take the chest that appears, because it's there, but shouldn't have bothered; it's just the compass, even more useless than usual.
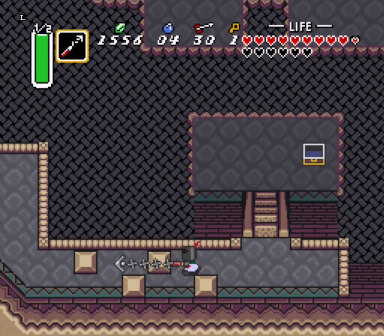
(2:15:34) As elsewhere, the Hookshot goes right through pushable blocks when they're in motion.
As minor a time save as Hookshotting through the blocks on the way out of the room is, it still feels satisfying.
There are a few ways to get past the Moldorm rematch without actually fighting Moldorm. Hovering across the gap with the Boots is the most common one. There's also a trick that involves combining a Bomb Jump with recoil from Moldorm itself to launch across the gap with more distance than would otherwise be possible.
The Mini Helmasaurs in the last room before the stairs decide to make a nuisance of themselves, so I just Ether them.
Finally, all that's left of the tower is the Aghanim 2 fight, sometimes jokingly called the Aghonometry exam. With optimal execution and some luck, it's possible to beat him in just two cycles. I don't exactly struggle, but it's safe to say it takes me a bit longer than that. Still, the outcome is inevitable.

(2:17:11) And how did that duck get in here, anyway?
If we're nitpicking, the game breaks internal consistency pretty badly here. You can't successfully use the Flute when you're in the Dark World or when you're in a dungeon, and you can't fly anywhere other than the eight predetermined locations. Yet here we are, getting a ride from inside a dungeon, in the Dark World, to somewhere that's not even particularly close to any of the usual destinations. But it does keep the action from stalling out, and sometimes that's more important.
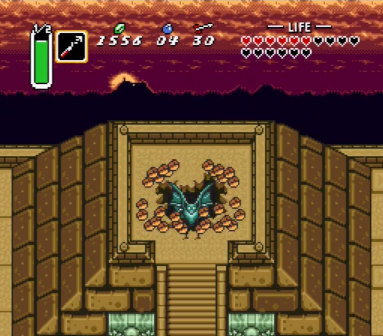
(2:17:21) Bat-Ganon bursting through the top of the pyramid honestly doesn't add much to the narrative here. I just think it looks neat. And that sky!
Before jumping into the fight, I take a quick detour down the pyramid to bonk into a tree for a faerie, snagging it with the Hookshot. It's not quite full healing, but with Blue Armor, Gold Sword, and a few potions as a safety net besides, 13 hearts should be plenty of health.
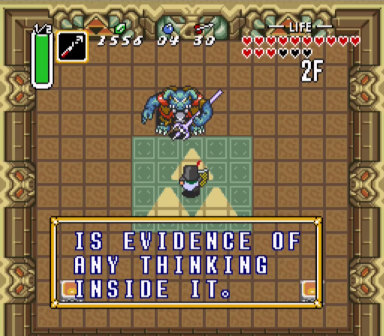
(2:18:05) Full message: "I'll be more
eager about encouraging thinking outside the box when there is
evidence of any thinking inside it."
Also, come to think of it, I'm not sure I ever noticed that
"2F" in the corner until now.
Like Blind, Ganon still speaks at the beginning of combat in the Randomizer, though he tends to have things like various quotes or other references rather than bad wordplay. You can also sneak in a quick hit before he starts talking, and yes, it does count.
Phase 1 goes by quickly thanks to the Gold Sword, though I do take a hit from his trident. So does phase 2, except for taking a hit from a stray bat at the very end of it. Runners will often use any of a number of strategies to safely get more hits in quickly during this phase, from standing inside the ring and using short dashes to avoid knockback from hitting him, to using the Hookshot to phase through the bats, to simply activating an invulnerability item.
Phase 3 is easy with the Tempered Sword or better; just him him when he turns solid, until the floor along all four walls collapses. The Master Sword would have made this (and all phases) more difficult because it needs spin attacks to damage Ganon at all. The fighter's sword is entirely useless here.
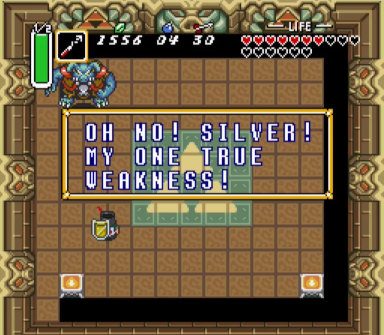
(2:19:06) "Oh no! Silver! My one true weakness!" So, what, is Ganon a werewolfboar or something?
Going into phase 4, Ganon reacts to our Silver Arrows. If we didn't have them, he would give a general idea of where to find them, though that can be as vague as "in the Dark World" if the other progressive Bow is in an overworld location. As I recall, he would toss out a mocking remark instead if we didn't have a Bow at all, or give a meaningless hint (like "on Planet Zebes") when using settings that don't allow Silver Arrows.
Quickly relighting the left-hand torch after it goes out activates the Torch Glitch, which prevents the right-hand torch from ever going out. If attempting to beat him without Silver Arrows, it makes a big difference, but as things stand, it barely even qualifies as a convenience. I do it anyway.
From this point, it's just a matter of stunning him with the sword and firing a Silver Arrow while he's stunned; lather, rinse, repeat. If you can catch Ganon far enough from the edge of the arena, it's possible to nail him with two or even three shots in a single stun. I manage a double hit to finish him off.

(2:19:46) Ganon is slain! Praise the Triforce decor shiny sword Silver Arrows sun!
Now we just need to cross the bridge into the Triforce room, and that's game! (Runners have been known, on occasion, to rush a little too much for their own good, falling into the pit before the path opens, and then they have to redo the entire Ganon fight...)
Anyway, that felt pretty good. True, I had the Gold Sword and Silver Arrows, but I haven't really practiced this fight all that much and I'm not as good as it as I'd like, so finishing with no real trouble and not even needing to think about using any potions is a nice way to end the run.
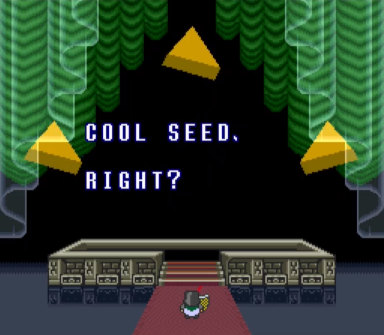
(2:20:04) "Cool seed, right?" You know what, Essence of the Triforce? It was pretty cool.
Like several other characters along the way, the Triforce gets a brief randomly-chosen line.
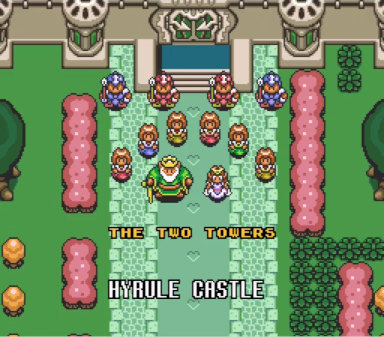
(2:20:33) "The Two Towers: Hyrule Castle". The Hyrule Castle tower and Ganon's Tower, perhaps?
Many of the lines in the ending itself also choose randomly from a selection of possible alternates. The usual line "The Return of the King" for the Hyrule Castle scene, for example, may be replaced with one of the other titles of the Lord of the Rings movies (or the books that came before them, though technically those are more properly described as three volumes of two books each, but I digress).
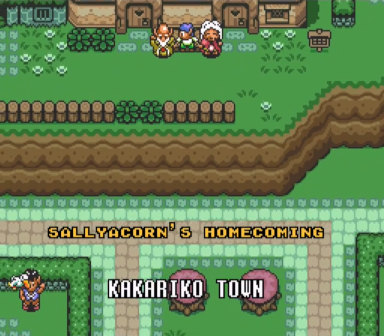
(2:20:50) "Sallyacorn's Homecoming: Kakariko Town"
Sahasrahla gets any of various silly long names that begin with 'S' for the first village scene.
I never quite understood why "Vultures Rule the Desert" was a happy ending sort of thing. Maybe because it means monsters don't? Except the vultures are functionally monsters in this game, so... ¯\_(ツ)_/¯

(2:21:33) "Your Uncle Has Beetor: Your House"
Certain lines, rather than being randomized independently, depend on the item placement in the seed. Solaire's uncle gave us a bee in a Bottle way back at the beginning of the run, so he has, um... beetor? I feel like I'm missing an inside joke. Google says it's a creature from Miscrits?
The Zora King sold us some overpriced Arrows, so the line for Zora's Waterfall is "Sewing Kit for Sale". Similarly, the Magic Shop gets "Fungus for Life" because they offered a heart container piece in exchange for the Mushroom, the Haunted Grove has "Life Boy Feels Love Again" because we dug up a heart container, and the second Kakariko scene mentions "The Really-Rich Kid" because the sick kid gave us 300 rupees.

(2:23:30) "Dancing Pickles: Lost Woods"
This feels like the most common line for the Lost Woods scene, and Buzz Blobs do look a lot like dancing pickles. It's only slightly more appropriate for the music building to a conclusion than the insignificant thief who seems to be scoffing at you, though. What's the point of this scene in the first place, anyway?
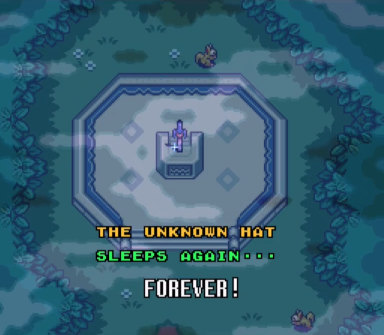
(2:23:48) "The Unknown Hat Sleeps Again... Forever!"
The Master Sword pedestal had an armor upgrade, so it's "hat" because armor also affects your hat (if using the standard sprites, at least), and "unknown" because it's a progressive item so the specific result of getting it depends on what you already have.
Earlier builds of the Randomizer didn't have progressive items, so you could, for example, find the Gold Sword five minutes into the run and basically break the game wide open. Progressive items, instead of saying this chest has the Gold Sword specifically, says it has a sword, and each one you find gives you the next better sword than what you already have. It's still theoretically possible have the Gold Sword five minutes into a run, but you would have to find all four of the progressive sword items (or three, if you started with a sword), and that's dramatically less likely, not to mention that even then, your sword would still improve stage by stage instead of suddenly jumping from nothing to maximum by finding a single item.
Similarly, the Bow and Silver Arrows used to be two distinct items, rather than having two progressive Bow items. That could result in the awkward situation of having Silver Arrows but not being able to use them due to lack of Bow. The current system makes either item immediately useful, and increases flexibility in cases where you need to find a Bow to progress, as either one of the two items placed will work.
The credits are largely the same as usual, up until near the end of the sequence. At the end of the credits, additional credits are added for Randomizer contributors, including a specific credit for the user who created the custom character sprite in use, if applicable. Solaire of Astora is brought to us by Knilip.
Credits for the Randomizer also include some modules we're not using on this run, including Entrance Randomizer, Enemy Randomizer, Door Randomizer (still in development), Festive Randomizer (available seasonally), and the Palette Shuffler. Perhaps another time...
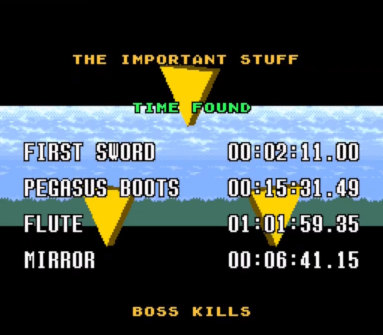
(2:27:03) "The Important Stuff: Time Found: First Sword - 00:02:11.00, Pegasus Boots - 00:15:31.49, Flute - 01:01:59.35, Mirror - 00:06:41.15"
At the very end of the credits sequence, we get some summary data for the run we just played. Yeah, we definitely found some good stuff early on. First sword, incidentally, refers to the first sword found, and doesn't include the starting sword when you start with one. Barely two minutes in, though? Yeesh.
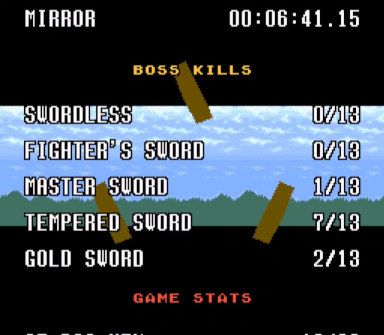
(2:27:14) "Boss Kills: Swordless - 0/13, Fighter's Sword - 0/13, Master Sword - 1/13, Tempered Sword - 7/13, Gold Sword - 2/13"
The game also tracks swords during boss fights. Apparently, some competition formats also take these into account for scoring purposes, so winning with a lesser weapon counts for more points. Note that the boss kills don't total 13 this time, because we skipped Hyrule Castle tower, Ice Palace, and Misery Mire.
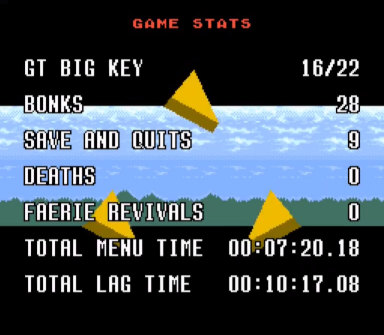
(2:27:26) "Game Stats: GT Big Key - 16/22, Bonks - 28, Save and Quits - 9, Deaths - 0, Faerie Revivals - 0, Total Menu Time - 00:07:20.18, Total Lag Time - 00:10:17.08"
GT Big Key is how many checks it took to find the big key of Ganon's Tower. This might not match the official number used in commentary chat, since that counts Bob's Torch as a check as soon as you see what's there, whereas the game itself only counts items that you actually collect.
A "bonk" is running into a wall when dashing, so we've had a few dozen of those, some of them even deliberate.
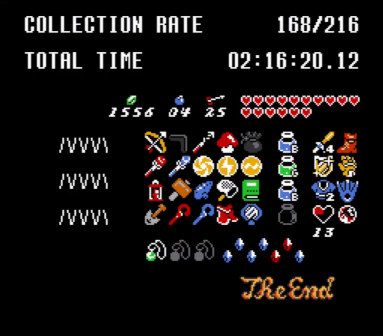
(2:27:57) "Collection Rate - 168/216, Total Time - 02:16:20.12". A listing of final inventory is also displayed, showing 1556 rupees, 4 Bombs, 25 Silver Arrows, 16 heart containers, the Gold Sword, Mirror Shield, Blue Mail, Pegasus Boots, Titan's Mitts, Flippers, Moon Pearl, Pendant of Courage, all seven Crystals, 13 of the 24 heart container pieces, and all Y items except for the Boomerangs and Magic Powder and one of the four Bottles (the three collected contain two blue potions and a green potion).
In the end, we got just about everything, but what about the rest of the items? We already know that the final full heart container item was in the Library, the blue Boomerang was on Bumper Ledge, and the second armor upgrade was on the Master Sword pedestal. Rather than keep playing to find the rest, I'll refer to the spoiler log, an optional report you can generate along with a seed that lists where everything is (and other miscellaneous information).
The red Boomerang (along with a piece of heart) was with the Pyramid Faerie, who would also fill empty Bottles with blue potion.
The last Bottle was at Hammer Pegs, and had nothing inside it.
The Powder was in Ice Palace in the big key chest, and the dungeon also had two pieces of heart (and the Pendant of Wisdom).
Misery Mire had only a piece of heart and a single rupee (and the Pendant of Power).
And the optimal in-logic route through the game would have gone roughly as follows. The playthrough sequence given in the spoiler log doesn't quite match this order, I believe in part because it works on the concept of "spheres" of availability and lists everything available within a given sphere before mentioning anything unlocked by that sphere no matter how little sense the routing makes in practice (for instance, the Eastern Palace big key is included in and listed with the same sphere as everything else you can get immediately after rescuing Zelda, rather than waiting until there's any real point in going to the dungeon), and in part to factor in health and such to satisfy the requirements of Basic placement logic. Small keys are not noted.
ALttPR homepage: https://alttpr.com
BizHawk homepage: http://tasvideos.org/BizHawk.html