Project Info and Downloads
All files are provided as-is, with no current plans for
maintenance, revisions, or updates.
Random name and UT bot generator
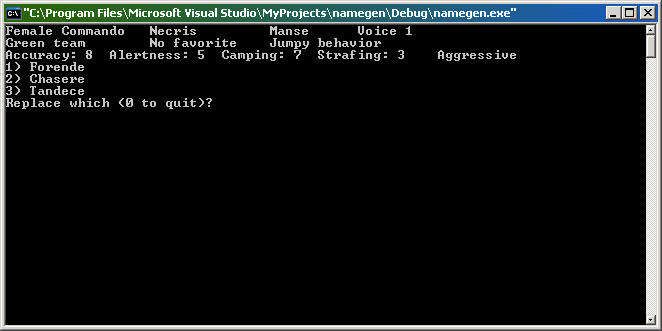
A fairly simple C++ program I wrote to randomly generate
names, and also pick random bot settings for Unreal Tournament.
Generated names range from 5 to 8 letters long and follow a
weighted probability distribution from a source I've completely
forgotten, based on English frequencies for first letter of a word,
two-letter sequences (e.g., the letter 'a' is common, but two in a
row are rare), and last letter of a word. The program generates
a set of three names to begin with, then allows you repeatedly
reroll your least favorite one while keeping the other two, which
tends over time to steer the results you keep toward options you
prefer.
If using this to roll up bots, note that some of the skins it can
pick are custom. The Rumiko model, at least.
Download
source code (4.5 KB)
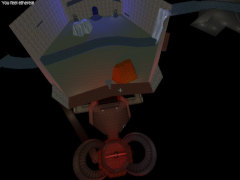
Unreal Tournament CTF level "Paradox River"
After finding out about how to use the engine's ability
to link two remote locations, I had an idea about a paradoxical
river that flowed into itself, looping endlessly if you kept
following it downstream (or upstream).
The original version of the map has the river connecting
to an otherwise-inaccesible cavern stocked with supplies, and a
high waterfall on one side of the central area. A major problem with
it was that, because I'd decided to make this a Capture the Flag
level, the whole cave thing was just too far out of the way for anyone
to realistically bother with, no matter what I put in there. Unless it was
one of the actual team bases, but asymmetrical CTF levels are
notoriously prone to imbalanced gameplay. That particular concept
would have worked better in a Deathmatch or Domination map,
but I'd decided on CTF, and that's what I was sticking with.
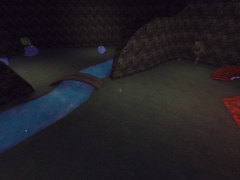
The revised version simply links both ends of the river to each
other, with a mini-waterfall inside the connection. It also has more
varied lighting and (in my opinion) an improved overall design. The
added bridge over the river gives a less awkward route across the
middle, while irregular tunnels curving through either cliff wall result
in paths that aren't out in the open. Extra walls jutting out of the cliffs
also provide some additional cover, and it's even possible, with
some skillful translocator use, to get up on top of the cliffs
themselves, where there's a moderate supply of sniper ammo
(not to mention a high vantage point) as a reward.
The bases themselves, which have a "fire and
ice" sort of theme that I'm rather fond of, remain mostly
the same between versions. Each side has a sniper tower built
into the cliff wall and another sniper nest down a tunnel
at ground level. The revised version also gives a
chance for players to spawn on a platform directly above the other
team's flag! I'm honestly not sure whether that's better described
as "exciting" or "ridiculous", but it seemed
like a good idea at the time. Or at least a novel one.
I've demonstrated the revised version of the map, with
some commentary about the map itself as well as the Unreal
Engine and UT in general, on YouTube: https://youtu.be/4uMLg61rb5I
Download
both maps (857 KB)
Pointless Text Adventure Game
As I recall, this started as a class project that I then expanded
a little more. It's written entirely in MzScheme, a varient of Lisp and
an... interesting... language to use. Unusual syntax, lots of
parentheses, and probably not meant for this type of program.
Basically, all you can do in the game is move around,
interact a bit, and get eaten by a troll, but I still think the code is
fairly interesting, and it's easy enough to expand if you know what
you're doing. The setting is loosely based on my college campus,
and the named characters, as I recall, were some of the Computer
Science professors.
If you want to get it running, you'll need an MzScheme
interpreter. I haven't tried it in years, so depending on what's
changed since then, an older version of the interpreter might
be necessary.
Download
game code (13.3 KB)
Java-based MUD with some Japanese support that needs a real name
I can't remember whether this sprung out of a class
project or if it was something I did just for fun, but either way,
this was an attempt to create a functional MUD (Multi-User
Dungeon, the text-based precursor to modern MMO games)
with multilingual support.
People can connect (with a Telnet client or similar), walk
around, and perform a few basic actions... and that's about it.
The dungeon itself is similarly minimal, with only a few
unremarkable rooms to explore.
If nothing else, the way it's designed should make it relatively
simple to add new commands. I have no idea how well it would
scale up to large numbers of players. Probably not very.
Download
server code (41.5 KB)
Nameless and Extremely Incomplete Verge3 Game
Once upon a time, I stumbled across a game creation kit
called Verge (short for Vecna's Extraordinary Roleplaying Game
Engine) that was basically meant as a freeware alternative to
something like RPGMaker. Many dabbled in it, but few ever
completed anything. For my part, I never really figured out what
I wanted to do with it in the first place, and just ended up making
a few maps, a tileset, a character sprite sheet or two, and
eventually menus and a primitive combat system that were both
buggy enough that I'd just as soon forget about them. Why didn't
I just use the ones built into the engine? That's the thing... there
weren't any built in. Which is probably a big part of the reason
that finished Verge games were practically unheard of.
Anyway, that was all in Verge2, an older version that I can't
even get to run anymore except in DOSBox. After Verge3 was
released, I ported my
overworld map and tileset, and a few of the other assets, into that,
but not much else. What's left is at least playable, and I think looks
pretty okay. There's almost nothing to do, though. It's
more of a very basic proof of concept than anything else.
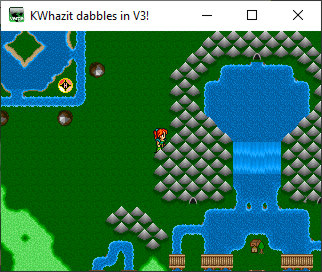
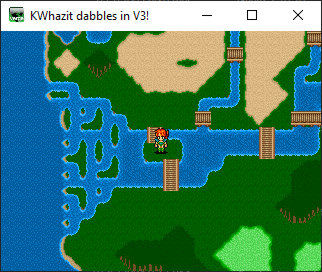
The world map tiles are mostly original, with some exceptions
that will be fairly obvious if you've played FFV. I like how the water
turned out, and the animated tiles I intended for HP and MP healing
spots aren't half bad, though the forests definitely need work.
The town map tiles, on the other hand... yeah, they're blatantly ripped
from FFVI. And so is the player sprite, though at least she has a full
recoloration, plus some extra intermediate animation frames when
walking up or down.
Unfortunately, I can't get MapEd 3, the map editor, to run in
Windows 10 (though the Windows version of MapEd 2 runs just fine,
oddly enough), so there's not much I could do with this at this point
even if I had any idea where I wanted to go with it. At least I was
able to correct a coding issue to make character movements
around fadeouts not look extremely awkward anymore (by using
EntityMove instead of PlayerMove so that the movement happens
in the background instead of everything else waiting for it).
There's an outside chance I might look back at my Verge2
menu code and try getting some of that debugged and working
in Verge3, especially if I can get the map editor working, but don't
expect that any time soon, if at all.
Verge homepage: https://archive.verge-rpg.com/
Download
game files (1.68 MB)
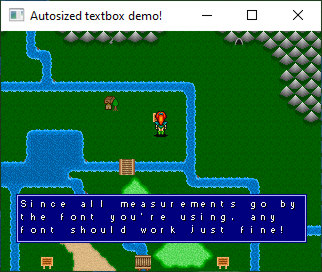
Verge3 Automatic Dynamically Sized Textbox Tech Demo
VergeC, the programming language for Verge, comes with
a lot of basic functionality for dealing with things like player inputs,
engine-specific file types like tilesets and character sprites,
and sound, music, and graphics in general. It's fairly bare-bones
otherwise, though, and has always been short on more advanced
conveniences. Not to mention lacking all sorts of features that
you'd probably expect an RPG engine to come with out of the box,
like inventory, menus, and (as the developers kept lampshading
in their demo game) a combat system. You can do all sorts of
things with it in theory, but have to roll your own versions of just
about everything.
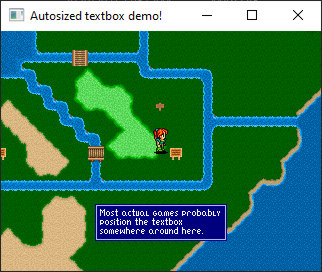
And so I decided to try writing a textbox function for Verge3 that
automatically resizes the box to fit the text it displays. This is a tech
demo showcasing the results. There's also a bit of Japanese text,
but I kind of cheated to get it to happen—that specific
message merely uses a custom font that displays those particular
Japanese characters in place of the numbers.
I've run through the tech demo and shown glimpses of the
underlying code, with some commentary, on YouTube, though I
seem to have accidentally skipped one of the signs: https://youtu.be/Q2AYO1SuQqM
Download
textbox tech demo (424 KB)
(incomplete) Verge3 port of Creepy Caverns
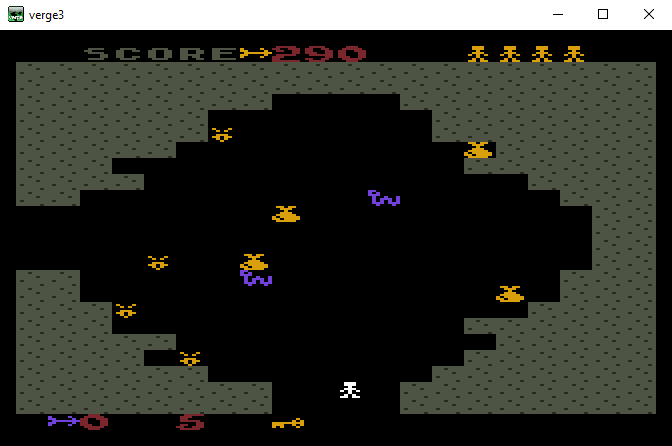
Created by 16-year-old Anthony Ramos on an Atari 400
using Atari BASIC, Creepy Caverns is a fairly simple (although
rather impressive for the time) action-adventure game focused
around exploring a randomly-generated dungeon and hopefully
surviving long enough to defeat the fearsome Megawump to win.
The August 1984 issue of Antic magazine featured it as
Game
of the Month, helpfully providing a full program listing for
readers to type in so they could play the game themselves.
At some point, I got the idea of trying to understand how
the code worked and port it to something that would run on a PC.
Since I was already familiar with the Verge engine, and both
Creepy Caverns and Verge basically work on a top-down,
tile-based system, it seemed like a natural fit. Over time, I was
able to reproduce most of the core functionality, including level
generation, basic gameplay, and monster behavior. Other parts
of the game, particularly the final battle with the Megawump,
were put off for later.
I never did get around to finishing it. There are no sound
effects, the player charcter doesn't animate or change colors to
match the room, the Megawump encounter is completely missing
except for a placeholder message, and worst of all, the monsters
don't even "dance" when you die! On the other hand,
I did add some debugging/cheat functionality like god mode and
a map, and improve the level generation routine to ensure that all
rooms would always be reachable—the original has only
a handful of rudimentary checks, such as ensuring that you don't
start too close to the Megawump and that certain special items
won't appear in the same room as each other, and will occasionally
create disconnected layouts, some of them entirely unwinnable.
Included with the download are the source files I based
things on. There's a dump of the Atari BASIC program listing
in a8_print_tmp5.txt, and CreepyCavernsABAS.txt is sort of a
pseudocode conversion of that to something more readable,
minus the parts that I finished porting completely.
I've demonstrated this port, with some commentary,
on YouTube. See the second half: https://youtu.be/Q2AYO1SuQqM
Between recording that and posting the game, I've made
one minor change. Room transitions now include a brief delay
and momentarily blank out the screen. They felt too abrupt without
it, especially compared to the Atari original, which pauses for a
second or two to do some processing every time you switch
rooms.
For comparison, here's my gameplay demonstration
of the original Creepy Caverns game: https://youtu.be/QwdY9g87USg
Download
incomplete Creepy Caverns port (993 KB)
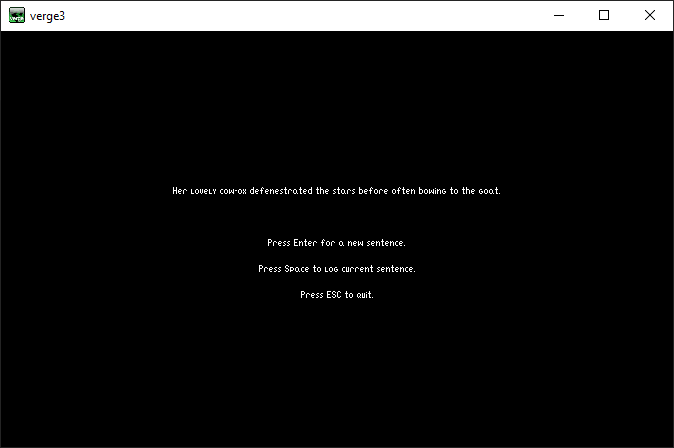
Random Sentence Generator
Don't care for fancy sound or graphics? Want something
that isn't affected by whether or not you can run the map editor?
Well, here's a random sentence generator I wrote in Verge3
at some point, back when I thought "defenestrate"
(to throw out of a window) was the most hilarious word ever.
And you know what? I'm not sure I was wrong about that.
The program has a limited vocabulary of various
categories of words (which you can easily expand by adding
more words in the functions at the end of randText.vc and
updating their random number ranges accordingly). It's designed
to use a variety of similar sentence structures within certain
constraints, and of course the exact structure it picks is
randomized, too. The results may not make much sense, but
at least they should always be grammatical!
Come to think of it, I could probably rewrite this in
javascript and have it run right here on the webpage.
Maybe later.
Download
sentence generator (756 KB)
Maps for The Faery Tale Adventure
An older game from Microillusions with a massive world,
The Faery Tale Adventure included a number of mazes with
important items inside. Here are some maps I made to guide me
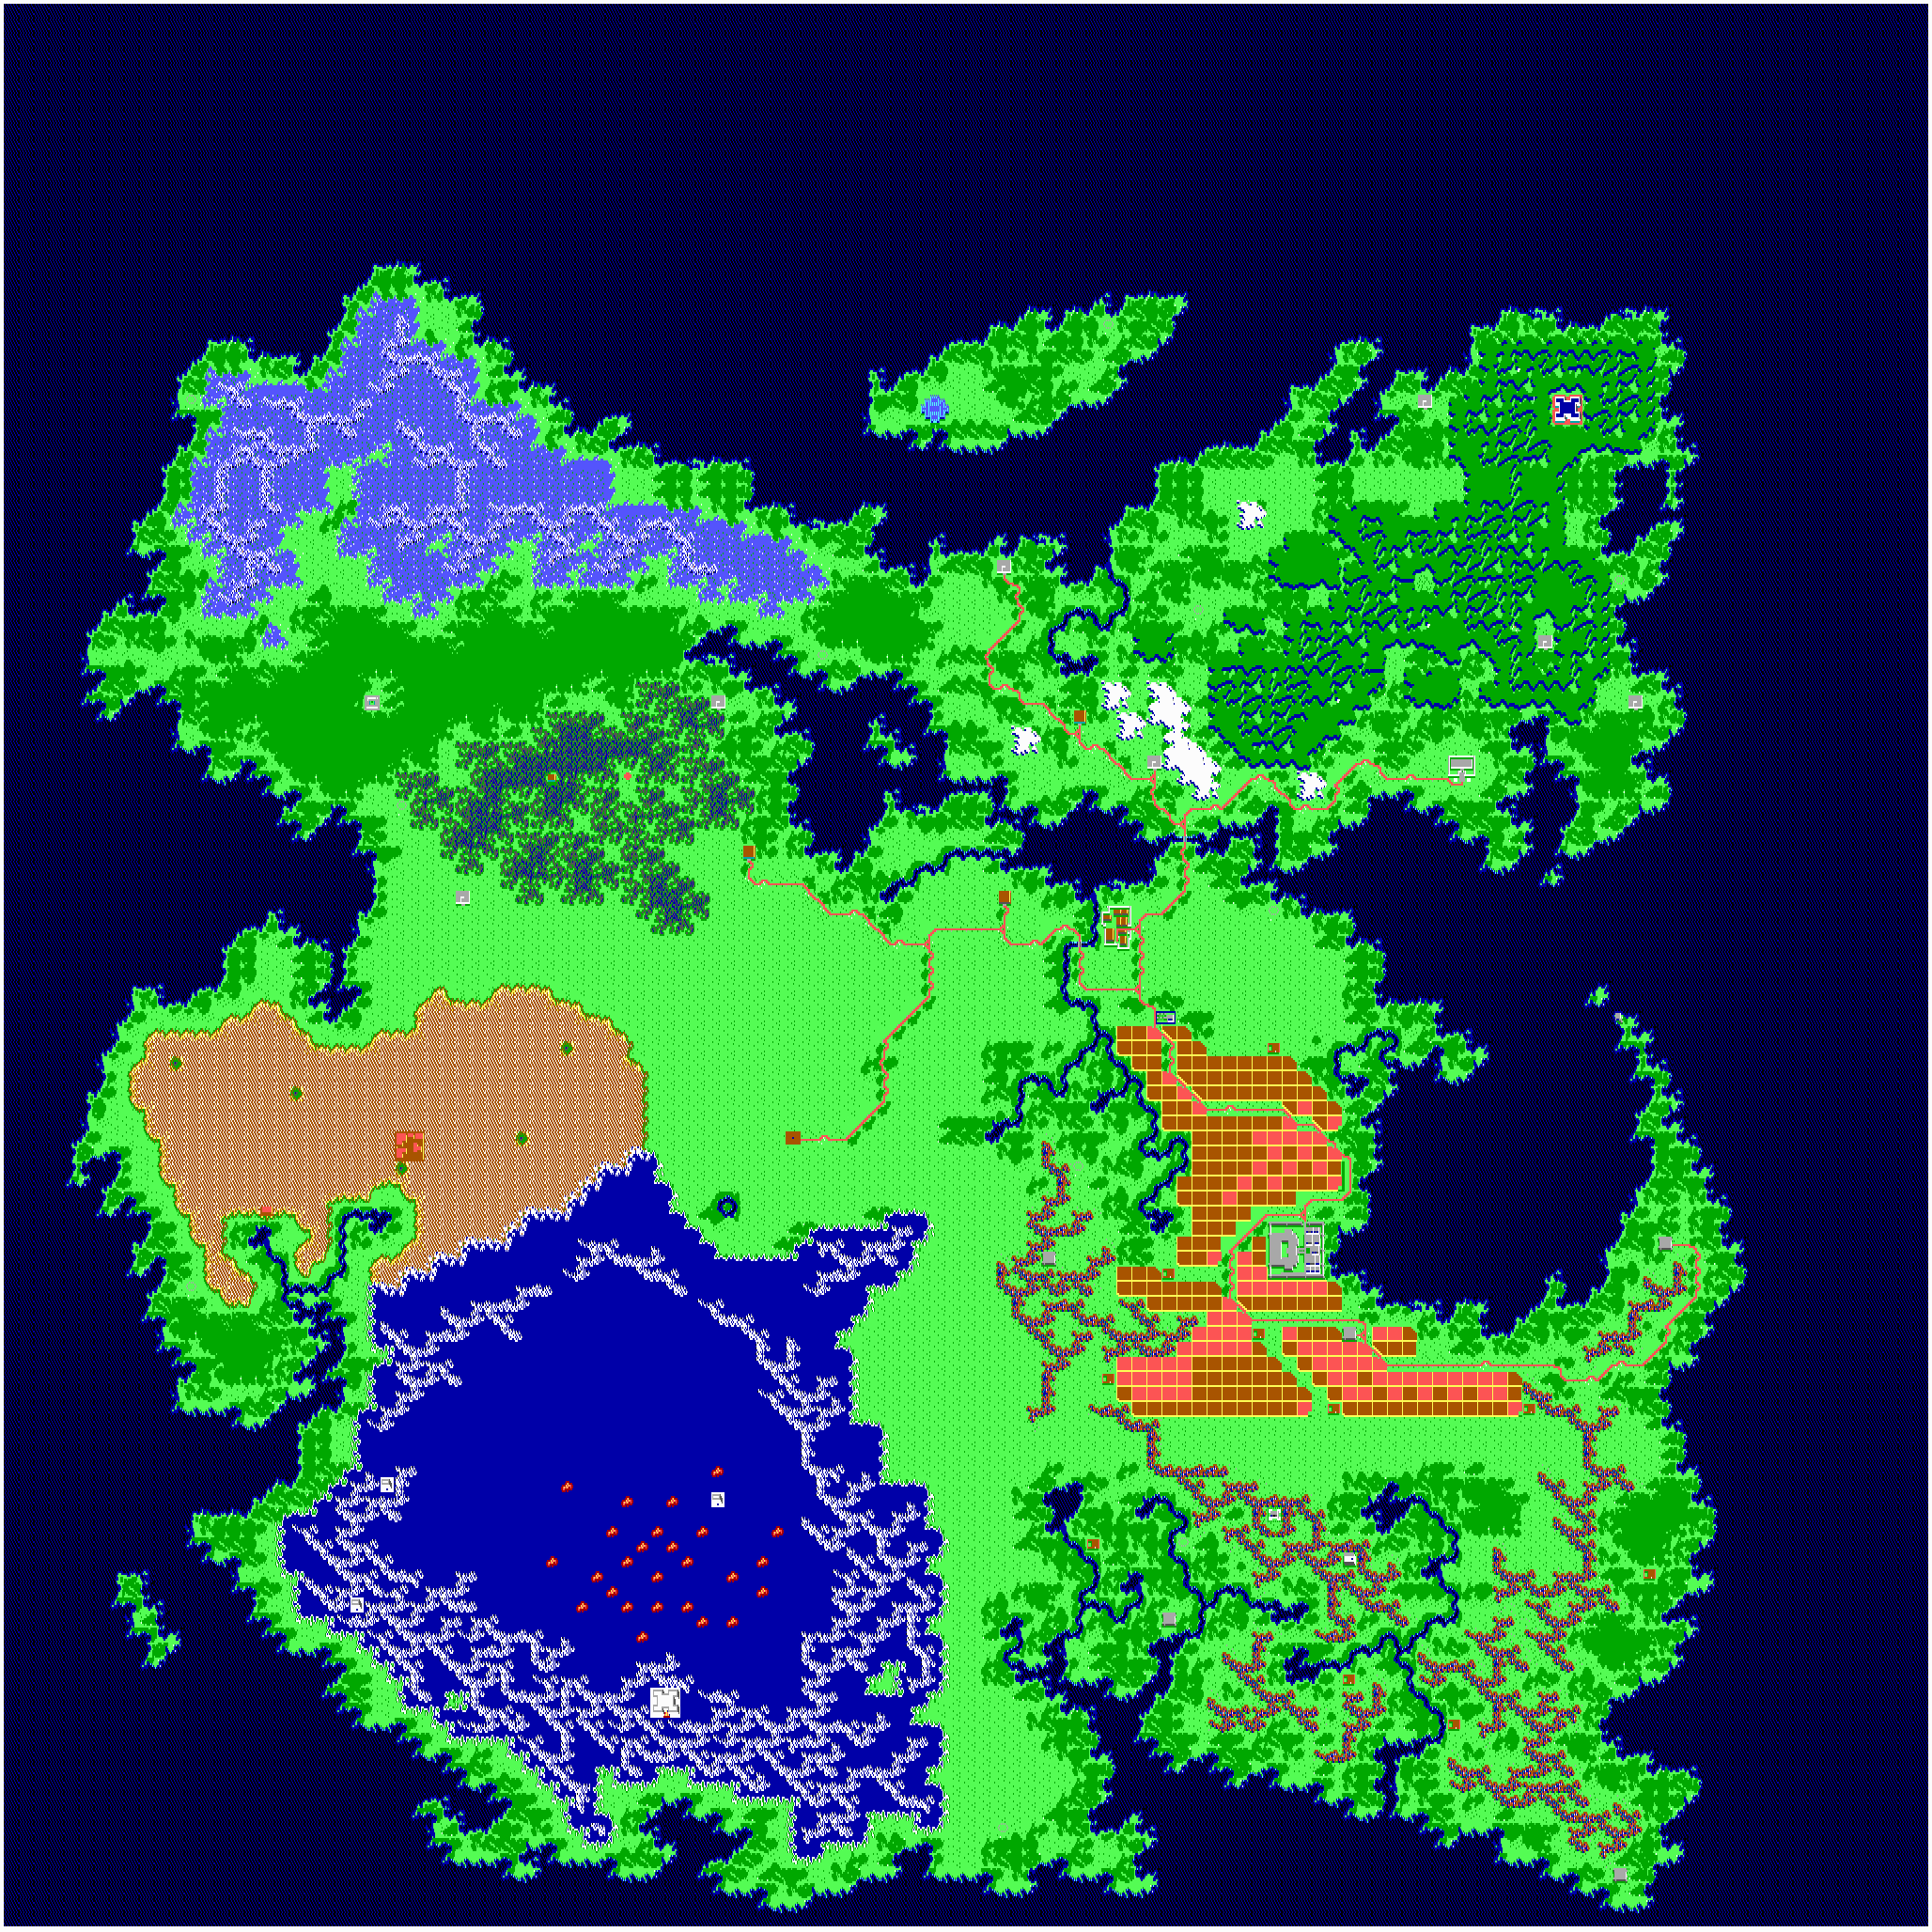
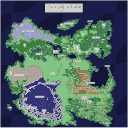
through the main ones, plus a map of the entire overworld pieced
together from many, many screenshots of using the in-game
bird totem item that shows an overview of your surroundings.
Click any of the images to enlarge, and note that they're
based on the MS-DOS EGA version, so the graphics (and
keyboard shortcuts where applicable) may not quite match other
ports, though the geography should be essentially the same.
(The original Amiga version and later Genesis port have
superior color depth, not to mention sound quality, whereas the
Commodore 64 port suffers from severe hardware limitations
and is markedly inferior in all of graphics, sound, and
performance. And the DOS CGA version, of course, has the
worst color depth of all.)
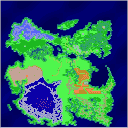
Full bird totem map
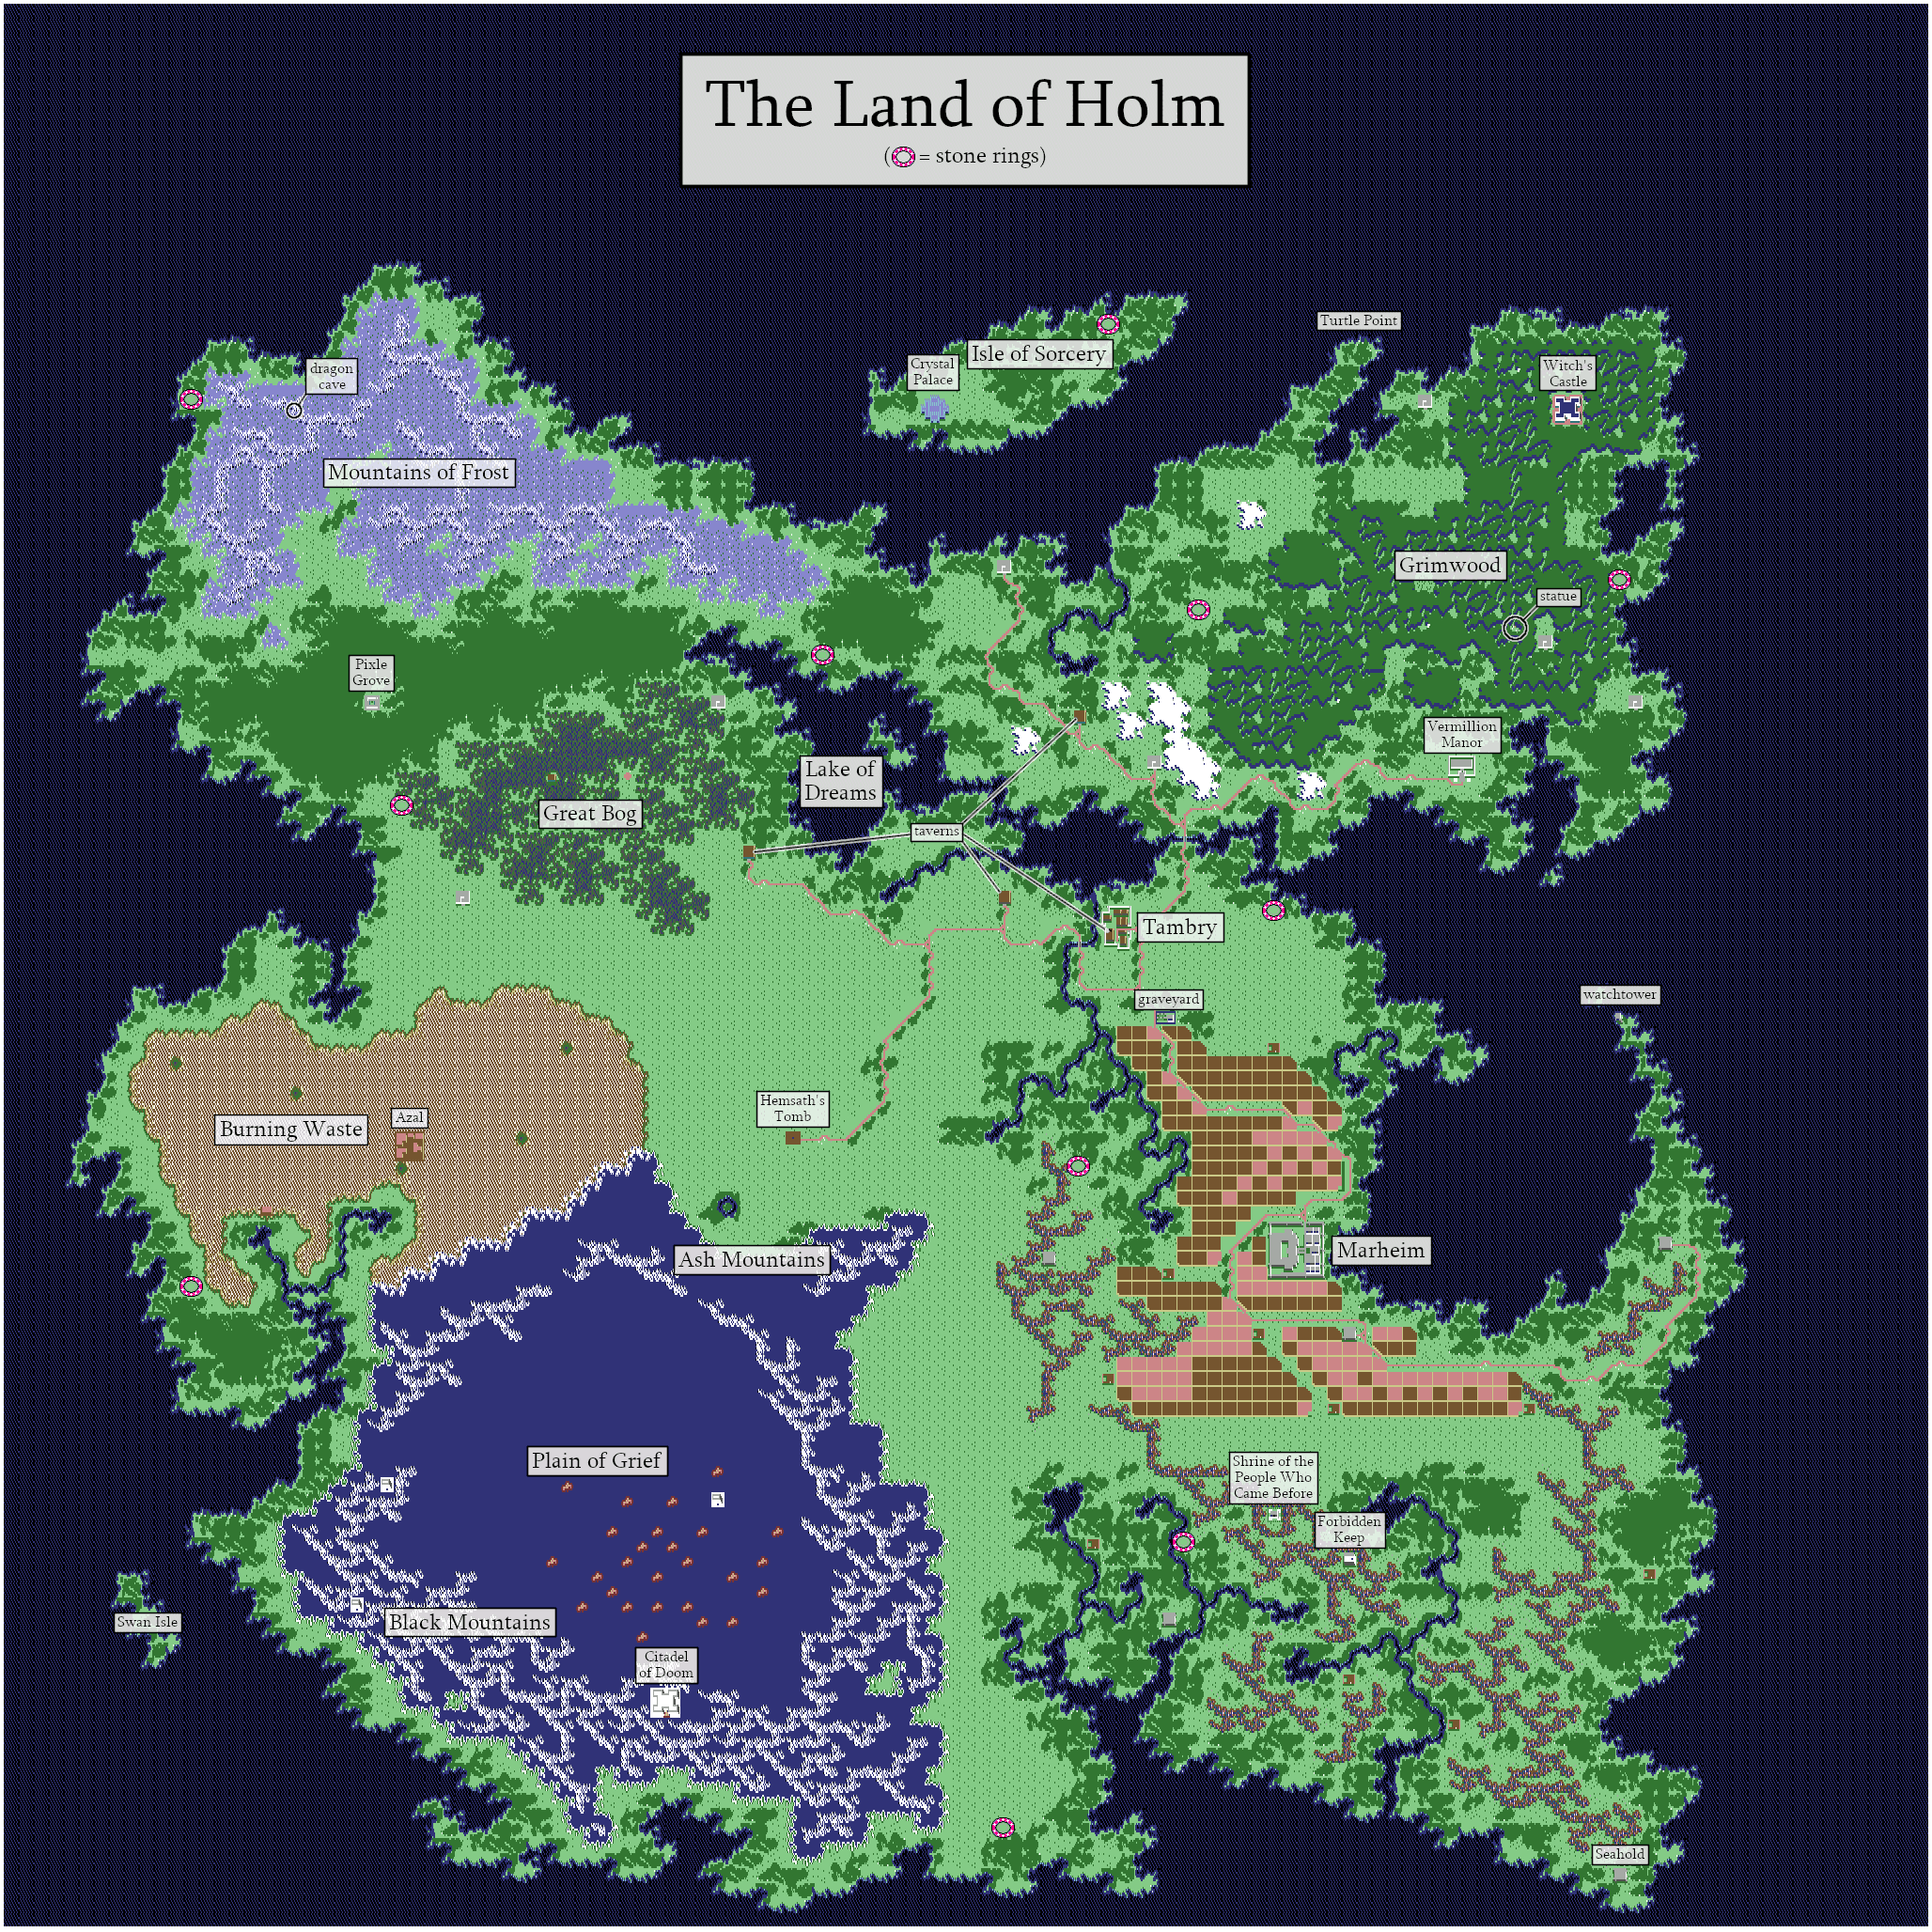
Annotated map
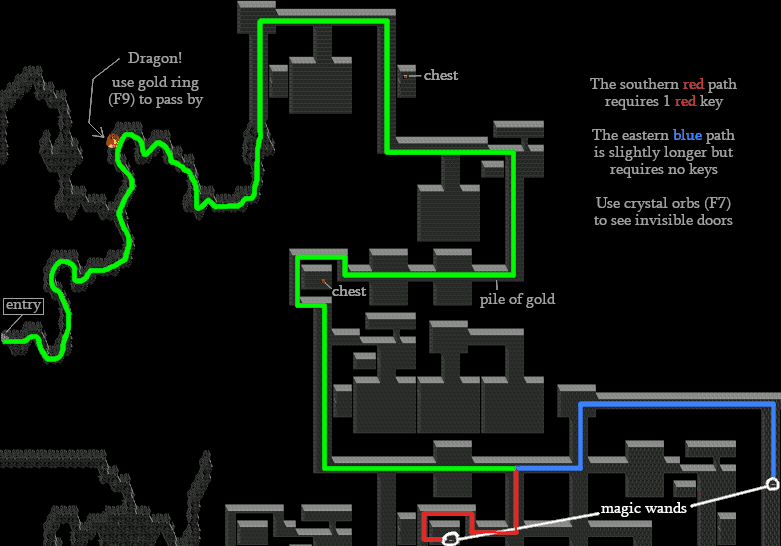
Map to the magic wands in the dragon cave
(entrance in northwest mountains, east of stone circle)

Map to the witch's castle in Grimwood
(skip the statue until you can fly)
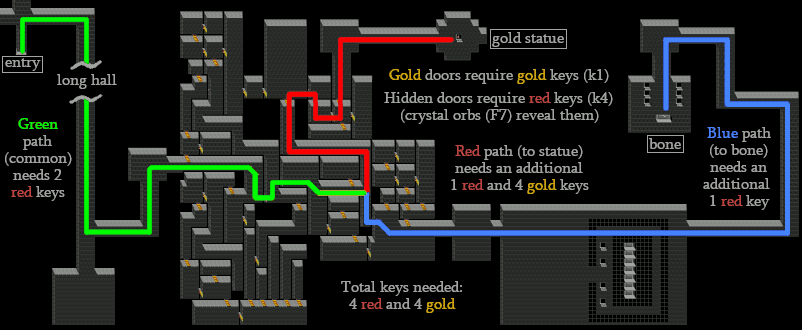
Map to the bone and gold statue in Hemsath's Tomb
(entrance at end of road southwest of Tambry)
Also, I've demonstrated parts of the game, with some
commentary, on YouTube: https://youtu.be/U5q8e6kMH5g
And while I'm at it, here's a bare-bones walkthrough of the
game. Many of these can be done in any order.
- Get a seashell from Turtle Point or the Watchtower
- Receive one statue and farm for Luck from the Crystal Palace
- Claim the sunstone from the Shrine of the People Who Came Before
- With the sunstone, slay the witch of Grimwood to claim the golden lasso
- With the lasso, tame the golden beast on Swan Isle to gain the power of flight
- Recover another golden statue from the Seahold
- Recover another golden statue from a clearing near the keep in southern Grimwood
- Fly to the Forbidden Keep and rescue a princess for a writ from the king
- Take the king's writ to the priest for another golden statue
- Recover a bone and another golden statue from Hemsath's Tomb
- With all five golden statues, explore Azal to find a rose
- Give the bone to the specter in the crypt at midnight for a crystal shard
- Find a magic wand in the dragon's cave
- With the protection of the rose and shard, enter the Citadel of Doom
- Use the magic wand to slay the necromancer
That was maybe a little too bare-bones. Then
again, maybe sharing any walkthroughs or maps at all
goes against the game's whole open world exploration concept.
Hmm. Well, either way, click the link below if you'd like to see a
more detailed guide.
[hide more detailed walkthrough]
I'm assuming keyboard controls since I find the shortcuts
far more convenient than going through the menus, and the
DOS version controls since that's the only version I've played.
Some details of the functionality may also be specific to the
DOS version.
Starting out and general gameplay tips
You begin your quest in the village of Tambry as Julian,
the best fighter of the three brothers. Use the arrow keys or
numpad to move around. Search the houses for some supplies
(use '?' to find hidden items, usually in fireplaces, and 'T' to take
things).
Your character gets hungry and tired over time. Warning
messages for hunger will appear in the narration window, so if you
see one, make a point of stopping by a tavern. Once there, press
'O' near the NPC to buy (for 3 coins) and immediately eat some food.
Repeat as needed until "feeling quite full". Either you
don't get messages for fatigue consistently or I keep missing them,
so every now and then, look for some bedding (found in most forms
of housing) and stand on it for a few seconds. Your character will
doze off if sleepy, or you'll be informed that he's not tired
otherwise.
If your character gets hungry enough, he'll start losing
health over time instead of slowly healing, and if he's starving for
long enough, he'll start moving in an awkward and very slow
stagger. If your character gets too tired, he may fall asleep out in
the open, where he's easy pickings for monsters. On the other
hand, hunger and fatigue reset after being revived, and health is
fully restored, so if you have the Luck to spare, taking a death
might not be such a bad idea if things get too out of hand.
Press 'P' followed by a letter from A to H to save to one of
eight slots, and 'L' followed by the corresponding letter to load a
previously saved game. Use Shift+'Q' to quit (you may need to
press that twice depending on the active menu).
The spacebar pauses and unpauses the game. 'I' will display
your inventory in graphical form. You can also toggle the music
with 'M' or the sound effects with 'F'.
Use 'A' for Ask or 'S' for Say (the two appear to be
interchangeable in all cases) to interact with NPCs. Many will give
hints, and some will do more than that. You can also use 'Y' to Yell,
but every NPC seems to respond to that with a "No need to
shout, son!"
After you leave Tambry, monsters attack at random in
groups of 1 to 5, with the music changing when enemies are nearby
as a warning. It's a good idea to hang around the area for a while
and do some fighting to build up your Bravery. Search dead foes
(use 'T' again for this) to find additional supplies, including their
weapons, which may be better than yours. No new enemies will
appear until the bodies despawn, which (except for wraiths) won't
happen as long as you stay in the immediate vicinity.
Be wary of wraiths, which are more dangerous than most
enemies and can pass through solid obstacles, and especially of
bowmen, which remain a threat no matter how strong you become.
The wrong set of enemies can wipe the floor with you when you're
injured or just starting out, so save early and save often, and be
prepared to load if things go bad. Also note that, other than a few
unremarkable location-specific creatures (bog snakes and cave
spiders), the same enemies appear all across Holm, so once
you can handle the monsters near town, you can handle the
monsters anywhere, with endurance as your only limitation.
To fight enemies, press Insert or '0' on the numpad to toggle
attacking. Combat is directional, so make sure you're facing your
attackers. Easier said than done in some cases, since it can
be difficult to distinguish sideways from diagonal, and enemies will
sometimes back away a few steps and come at you again from
a different angle. Try to get lined up before engaging.
The graveyard down the road southeast of Tambry is a good
place to fight early on. Position the fence between yourself and the
attackers, and they tend to just walk up against it and stand there
(except for wraiths, which can pass through it). When they do, you
can usually attack them through the fence, but they can't attack
back. It may not be playing fair, but it's far safer than fighting in the
open.
Once you have more weapons, press '1' for dagger, '2' for
mace, '3' for sword, '4' for bow, or '5' for magic wand. When you
pick up a "better" (higher-numbered) weapon than the
one you're currently using, you'll switch to it automatically (which
gets annoying when looting bows). The sword is your best
general-purpose weapon, and there's no real reason to use the
dagger or mace ever again once you have one. Also, there's no
variety within types. A sword is a sword is a sword, and you either
have one or you don't.
The bow and wand can attack from a distance,
and fire missiles when you press the attack button, rather than
having a toggled attacking state. If you pick one up while already
attacking with a melee weapon, you may get stuck in place thanks
to attack mode not turning off properly. If this happens, just switch
back to a melee weapon and stop attacking as usual.
If Julian dies, a faery will come along and revive him, but he'll
lose 5 Luck. If his Luck runs out, he'll stay dead, and you'll basically
start over from Tambry as Phillip, the luckiest brother. Try not to let
this happen too far out of the way after getting important items,
because Phillip will need to find Julian's body to retrieve them.
Other than that, Phillip plays just like Julian. Should his generous
amount of Luck run out, you'll similarly start over back in
Tambry again as Kevin, the kindest but otherwise least capable
of the brothers, with another body to find, and if his
Luck runs out, there aren't any more brothers left so that's game
over.
Some magic items can help with combat. Glass vials (F6)
recover some health, and you can buy more in taverns for 15 coins
with the 'V' key. Gold rings (F9) temporarily freeze monsters;
they're harmless when frozen, and though you can't kill them until
the ring wears off, you can take their items and disarm most kinds.
Jade skulls (F10) will instantly kill all common enemies in the
area.
Jade skulls (and white keys) only drop from wraiths, which
are the trickiest monsters to loot as well as being the most
dangerous non-archers. Dead wraiths collapse into piles of
cloth that you'll often fail to find anything in even when there's
still an item there, and will disappear altogether after a random
amount of time. Keep tapping 'T' repeatedly when you kill one
until you find something.
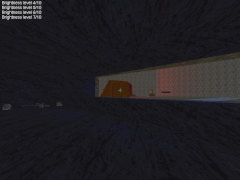
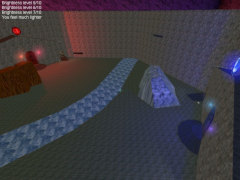
There are also other types of consumable magic items.
Green jewels (F5) temporarily improve visibility at night with a false
color effect. Crystal orbs (F7) temporarily reveal concealed
doorways. Bird totems (F8) display an aerial view of your
surroundings outdoors, and are the only common items that
enemies never drop, but you can buy more in taverns for
20 coins with the 'E' key.
Finally, blue stones (Z) work only when standing inside one
of the eleven stone rings scattered across Holm, and will teleport
you to a different ring, chosen based on which ring you teleport
from and which direction you're facing when you use the blue
stone. I won't map out the entire network, but here are some
useful connections from the stone circle east of Tambry: Teleport
when facing west to reach the Isle of Sorcery; return by teleporting
from there when facing northeast. Teleport when facing south to
reach the circle west of Grimwood; return by teleporting from there
when facing southeast. Teleport when facing northeast to reach
the circle near the Shrine of the People Who Came Before; return
by teleporting from there when facing west. (I would also include
the circle near the dragon's cave, except that it doesn't have a
direct connection with either of the rings closest to Tambry.) Also
note that if your character is staggering from extreme hunger, he
moves fairly erratically and may not be facing the direction you're
trying to move in. (The later Sega Genesis port does
away with all this and instead lets you pick your destination from
a list of all ten other stone rings, regardless of which one you start
from. It also lets you buy blue stones from taverns for 20 coins,
and even calls them "travel stones" in the shop menu
to remind you of their purpose.)
In addition to coins, weapons, and magic items, enemies will
often drop keys. These come in six colors, and each locked door
responds only to a single key type. When next to a locked door,
press 'K' and then a number from 1 to 6 to try a gold, green, blue,
red, grey, or white key, respectively. Keys are consumed when
used, and doors relock upon changing maps. The DOS
port also gives each key a distinct shape in the inventory
to compensate for the CGA version's inability to display more
than four colors at once.
Anyway, Bravery (Bv) is your combat skill and goes up
with each kill, Luck (Lk) is used for revival as noted above,
Kindness (Kd) can be raised by giving money to beggars
(press '$') but rarely matters unless it's so low that NPCs refuse
to help you, Vitality (Vt) is your health and has a maximum that
gradually increases as Bravery does, and Wealth (Wl) is how
much money you have.
How to beat the game
Once you can hold your own in combat, head north
to Turtle Point or east to the watchtower to get a seashell, which
you can use (by pressing '7') when near water to summon a
giant turtle that effectively acts as a boat.
Take the turtle, or use stone rings to teleport, to the Isle of
Sorcery in the north, where you can use a blue key to enter the
Crystal Palace and meet a sorceress who gives you one of the
five golden statues you'll need. Talk to her repeatedly for Luck
bonuses.
From here, you can sail north to wrap around to the south
edge of the world and go up the river toward the Shrine of the
People Who Came Before in the mountains south of Marheim,
or use the stone rings to teleport to the same area. Outfight the
Knight of Dreams who guards the shrine (or use a gold ring or
jade skull) to enter and claim the sunstone.
With the sunstone, you can slay the witch in Grimwood.
It's a long trek to get there, but follow the map above to find your
way to her castle. Inside, use the sunstone (press '8') to make
her vulnerable, then attack and win for a magic golden lasso.
With the lasso, you can tame the golden beast. Sail the
turtle to Swan Isle in the southwest to find a giant golden swan.
Walk onto its back to climb on and fly over all terrain at high speed.
The swan moves constantly when in flight, but can change
direction instantly. You can land on most types of open ground by
pressing the attack button. (The EGA version makes the
swan always fly full speed straight ahead, and so lets you land
regardless of speed. In many other versions, which oddly
includes even the CGA DOS version, the swan has varying
flight speeds, and you need to slow down to land. Trying to move
in the opposite direction can reduce your speed these versions,
and at least in the CGA version, so can re-pressing the same
direction you're already going.) The swan will stay where
you left it until you get back on, so remember where you parked!
Flying makes everything more convenient (except
teleporting, since the swan stays behind, but flight makes that largely
obsolete anyway), so this is a good time to head to the
Seahold in the far southeast for a second golden statue, and to a
small clearing just northwest of the keep in southern Grimwood for
a third (see maps above). Enter the keep with a green key for piles
of bird totems, too, while you're there.
Flying is also the only way to enter the Forbidden Keep,
surrounded by mountains south of Marheim. Land on the roof
and go inside to rescue the kidnapped princess. After a brief
cutscene of sorts, the game automatically takes you to the throne
room of the castle in Marheim, where the king gives you a writ.
Leave the castle (you're locked inside, bizarrely, and can
potentially be stuck if you don't have two gold keys to use!) to find
the golden swan waiting for you in the town square, thankfully.
Before flying off again, though, show the writ to the priest in the
building directly east of the castle entrance (you'll need a grey
key to get inside) for a fourth golden statue. (The priest also fully
heals you when spoken to, which may be worth keeping in mind,
especially earlier in the game.)
Additionally, there are two houses (grey keys needed) in
southern Marheim that contain not even a dozen apples total.
These are the only known form of portable food in the game.
Unfortunately, you have no control over when to use them; if your
character gets peckish and has any, he'll eat one automatically,
even if you're just a few steps from a tavern. And once they're gone,
they're gone! (The later Sega Genesis port lets you buy
apples as travel rations from taverns for 8 coins, more than twice
the cost of standard food but well worth it when exploring.)
There's just one more golden statue left, and it's in the
same general location as another item you'll need. Follow the
roads southwest of Tambry to reach Hemsath's tomb, then use
the map above to navigate through the door maze to the final
golden statue and the bone of an ancient king. The optimal
legitimate path (there may be places where you can clip through
the walls or doors in unintended ways, especially when attacking
enemies) uses four gold and four red keys. The gold doors stand
out visually, whereas the doors that take red keys are invisible
when closed. Using a crystal orb (F7) will temporarily reveal them
as dotted outlines, but that's entirely optional; you'll still get an
"it's locked" message if you brush against one when
it's invisible, and can unlock it without issue.
With all five golden statues collected, the hidden city of
Azal will appear in the Burning Waste. It seems to have been
abandoned, but search the eastern building to find a rose,
which (somehow) lets you walk across lava as though it were
ordinary solid ground.
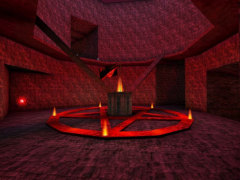
With the bone from Hemsath's Tomb, head to the
graveyard southwest of Tambry and enter the crypt at midnight.
A spectre appears here at this time, and if you give him the bone
as he asks you to (press 'N'), he rewards you with a crystal shard.
This will let you pass through the barrier blocking the way inside
the entrance to the necromancer's citadel.
Now, all you need is a way to kill the necromancer. Starting
from the stone circle west of the Frosty Mountains in the northwest,
go slightly south and proceed east to find the dragon's cave. Follow
the map above to make your way to one of the two magic wands,
conceptually the "best" weapon but generally inferior
to a sword in practice. It's basically a bow that doesn't use up
arrows.
Only one thing left to do, then. The ground around the
necromancer's citadel is too hot for the swan, so land further north
and cross the rest of the Plain of Grief on foot. Walk across the
lava blocking the entrance (rose required), pass through the
barrier inside (crystal shard required), and then step through the
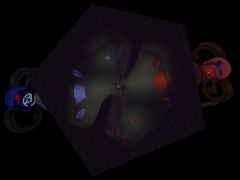
portal into the bizarre astral plane.
Inside the astral plane, geometric shapes attack every so
often, but if you've made it this far, they should be no threat at all.
The real problem is the color-coded flooring, most of which inflicts
nuisance gimmicks—green floors are normal, but blue floors
have ice physics, red floors speed you up, and the black floor
around the necromancer himself at the end inverts directions
(and stepping on to and off of it gets finicky). Falling off the walkways
into the starry abyss kills you; it costs 2 Luck to revive nearby.
At the end of the path, in a red-floored arena surrounded
by black floor, you'll find the necromancer himself. Pull out the
magic wand and shoot him until he falls. He'll drop the amulet
you've been looking for all this time. Pick it up to win.
Miscellaneous
There are a number of other locations in the game that seem
like they ought to be important, but they're all either optional areas
with clues or supplies, or have no discernable significance at all.
Like the mysterious Pixle Grove, which apparently does nothing.
I think I remember reading that the developer said it was the
remnant of an idea that never made it into the game. In any case,
there's a lot of world to explore, and even if you never need to visit
most of it, that was a large part of the appeal of the game.
Speaking of which, just because something is locked or
difficult to reach doesn't mean there will be anything worthwhile
there. Some remote buildings are completely empty, and I don't
think I've ever found anything at all by unlocking a cabinet.
Taverns also sell weapons and ammunition. A mace ('C') costs
30 coins, a sword ('D') costs 45 coins, a bow ('B') costs 75 coins,
and arrows ('R') cost 10 coins for a pack of ten. Enemies drop them
all the time, though, so you're better off saving your money for food,
glass vials, and bird totems. And be warned that the game will still
let you spend money on a weapon when you already have it!
During combat, your character will advance forward when
inflicting damage and be pushed back when taking damage.
You can sometimes take advantage of this to pass right through
locked doors, but be careful not to get yourself stuck!
When your Bravery gets sufficiently high, not only do you
become essentially immune to enemy attacks (except missiles),
but you don't have to worry about facing them directly to attack,
and can eventually even hit enemies behind you! My best guess
is that the game grows your attacking radius and shrinks the
enemy's as you get stronger, potentially to the point that you can
hit anything that's anywhere near you but they can't hit you at all
even if you just stand there... except with missile weapons.
I sometimes have trouble getting the seashell to work after
receiving it from the turtle at Turtle Point, possibly because it's
added directly to your inventory instead of you picking it up as
is usual, or perhaps the turtle's state just isn't initialized properly.
If this happens, sailing over to the watchtower and taking
the one there always seems to fix things.
Many outcomes in the game, including the exact amount
that glass vials heal and what you find in containers like treasure
chests, are chosen randomly when the event occurs. If you're
not averse to save scumming, you can manipulate the results for
such things.
The solidity of certain types of walls is a bit glitchy. In
particular, you can walk into the seemingly continuous west wall of
a keep, just above where the main structure meets the wing below,
then continue east to the doorway and go inside without unlocking
it.
The rose isn't strictly necessary to beat the game (and
so neither are the five golden statues, or most of the rest of
the game, for that matter). Lava seems to functionally be an
unusually deadly sort of water as far as the game is concerned,
and an odd side effect of that is that you can usually get the
turtle to appear in it by using the seashell when the far side of the
lava pool is offscreen. This includes the lava blocking the citadel
entrance, so if you move far enough south that the lava is almost
out of sight, you can summon the turtle and ride it right up to the
doorway. Oops?
Turns out you don't need the magic wand, either.
At least in the DOS versions, arrows work just fine against
the necromancer.
[hide more detailed walkthrough]
E-mail
questions, comments, suggestions, corrections, etc.